red velvet

Red Velvet Macarons with Cream Cheese Filling | Gluten Free | Natural | Dye-Free

Ingredients- Macaron Shells

150g egg whites (from 4-5 large eggs)
150g (¾ cup) granulated sugar 
1 tsp egg white powder (optional, but encouraged in humid environments)
157g (1 ½cups plus 1 tbsp) almond flour 
157g (1 ½ cups plus 1 tbsp) powdered sugar 
1 tsp non-alkalized cocoa powder 
1 ½ tsp Color Kitchen Red Velvet color 

Ingredients- Cream Cheese Filling

85g (6 tbsp) butter, room temperature
85g (3 oz.) cream cheese, room temperature
240g (2 cups) powdered sugar, sifted
1 tsp vanilla
¼ tsp salt
Color Kitchen Natural White Sprinkles

DIRECTIONS

Prepare tools: Line 2-3 baking sheets with silicone mats or parchment paper. Fit a large piping bag with a plain round piping tip. Flip the piping tip upwards and place in tall cylinder container (like a tall beverage glass or liquid measuring cup) for ease of filling. Set aside. 

Prepare dry ingredients: Sift together the almond flour, powdered sugar, Color Kitchen Red Velvet color, and cocoa powder in a large bowl. Set aside.

Prepare Swiss meringue: In a heatproof mixing bowl, combine the granulated sugar and egg white powder (if using).  Whisk in egg whites until combined.

Place the bowl over a pot of simmering water (double boiler) and whisk constantly until the sugar has dissolved. The egg white/sugar mixture will look somewhat foamy and feel barely warm to the touch. You can test this by rubbing a little between your fingers—there should be no graininess. Be careful not to overheat the egg whites. 

Remove the bowl from the heat and immediately transfer to a stand mixer with whisk attachment (a hand-held mixer with whisk attachment will also work here, but will take slightly longer.). Start whisking on low to loosen the egg whites and gradually increase the speed to high until stiff, glossy peaks form. 

Start the macaronage process: Using a large, flexible spatula, fold in half of the meringue into the dry ingredients until fully incorporated. Fold in the remainder of the meringue and begin the macaronage process by gently folding the batter and smashing it against the side of the bowl in a “J” motion, rotating the bowl as you go, to slightly deflate the meringue. In the beginning, the batter will be thick and lighter in color, but as you continue to deflate the air bubbles out of the meringue, the batter will become more cohesive, loose, and darken in color. Continue the macaronage process until the batter reaches the ribbon stage (the batter is able to fall off the spatula in an unbroken ribbon while able to make the figure eight). Be careful not to over-mix by stopping periodically to check for proper consistency. You can always test a small amount of batter by spooning it onto a plate and watching for it to slowly flatten out with no visible peak. 

Pipe the macaron shells: Once the batter is properly mixed, transfer it to your prepared piping bag. While holding the piping bag perpendicular to the baking sheet, pipe small, even circles about 1.5 inches in diameter. Be careful not to pipe at an angle or the macarons will not bake evenly. Let the piped macaron shells rest at room temperature for about 20-60 minutes, or until they form a dry skin on top. To check if they are ready, gently touch the top of a shell—if it doesn't stick to your finger, they are ready to bake. 

Preheat oven: While the macarons are resting, preheat oven to 300°F.

Prepare cream cheese filling while macarons are resting: For the filling, beat together softened cream cheese, butter, and vanilla until fluffy. Add in sifted powdered sugar and salt and mix until creamy. If using a piping bag, fit with desired piping tip and fill with cream cheese frosting. Set aside. 

Bake the macaron shells: Once the macarons have formed a skin, bake the macarons one sheet at a time for approximately 12-16 minutes, depending on your oven. You can test for doneness by gently nudging a shell with a finger—if it remains anchored to the foot and doesn’t move around, it's done. Let the macarons cool completely on the baking sheet. Once cooled, they should easily peel off the parchment or silicone mat. Pair up the macaron shells by similar size. 

Assemble the macarons: Pipe or spread a small amount of cream cheese filling on the flat side of one macaron shell, then gently press a matching shell on top. Decorate the sides of the macaron with desired sprinkles. For best flavor and texture, let your macarons age in the fridge for at least 24 hours before serving. This allows the filling to soften the macaron shell and helps the flavors meld together. Bring them to room temperature before serving.

Storage:  Store filled macarons in an airtight container in the refrigerator for up to one week or in the freezer for up to six months. 

Tips:

  • Weigh Ingredients: Using a food scale is highly recommended, as the slightest off-balance of ingredients can prevent a successful end-product. 

  • Wipe down mixing bowl and whisk with lemon juice or vinegar, if necessary, to remove any residual grease that will prevent the meringue from forming.

  • Use finely ground almond flour for the smoothest macaron tops. Quickly pulse dry ingredients together in a food processor if you find your almond flour is too course, but don’t over-mix or it will release too much oil.

  • Oven Temperature: Ovens can vary, so keep a close eye on the macarons during baking. Using an oven thermometer is very helpful here!

  • Rest Time: Don’t skip the resting step; it helps the macarons form their signature “feet”, prevents cracking, and ensures even baking.

By Heidi Lin @heidilinbakes

Red Velvet Cookies with White Chocolate and Sea Salt | Gluten-free | Natural

Color Kitchen Red Velvet Cookies 4

Using our natural Red Velvet Color, create delicious red velvet cookies with white chocolate, topped with sea salt.

MAKES: 24 COOKIES

Color Kitchen Red Velvet Cookies

INGREDIENTS

1 ½ cups gluten-free all-purpose flour
¼ tsp xanthan gum (if not already in flour blend)
¼ cup non-alkalized cocoa powder
1 Color Kitchen Red Velvet Color Packet
1 tsp baking powder
¼ tsp salt
½ cup butter, room temperature
¼ cup natural sugar
¾ cup packed brown sugar
1 egg, room temperature
1 tbsp buttermilk milk
2 tsp pure vanilla extract
white chocolate chunks
coarse sea salt

VEGAN SUBSTITUTIONS: Replace egg with 3 tbsp aquafaba, buttermilk with vegan yogurt, butter with ½ cup vegan butter and vegan white chocolate.

DIRECTIONS

Preheat oven to 325 degrees.

In medium-sized bowl, combine dry ingredients. In a larger bowl, add egg, buttermilk, and vanilla and mix with a hand or stand mixer on low speed. Add butter and mix on low for another 30 seconds, scraping down the sides of the bowl with a spatula until completely blended. Slowly. combine in dry ingredients and blend, but do not overmix. Add white chocolate and lightly fold in. Save some chocolate bits to put on top after baking, in case the baked chocolate gets a little colored when baking.

Scoop dough into rounded tablespoons and place on cookie sheet 2 inches apart. Sprinkle cookies with sea salt.

Bake for 12 minutes. Remove from oven and add extra white chocolate on top if needed.

Enjoy with a tall glass of milk!

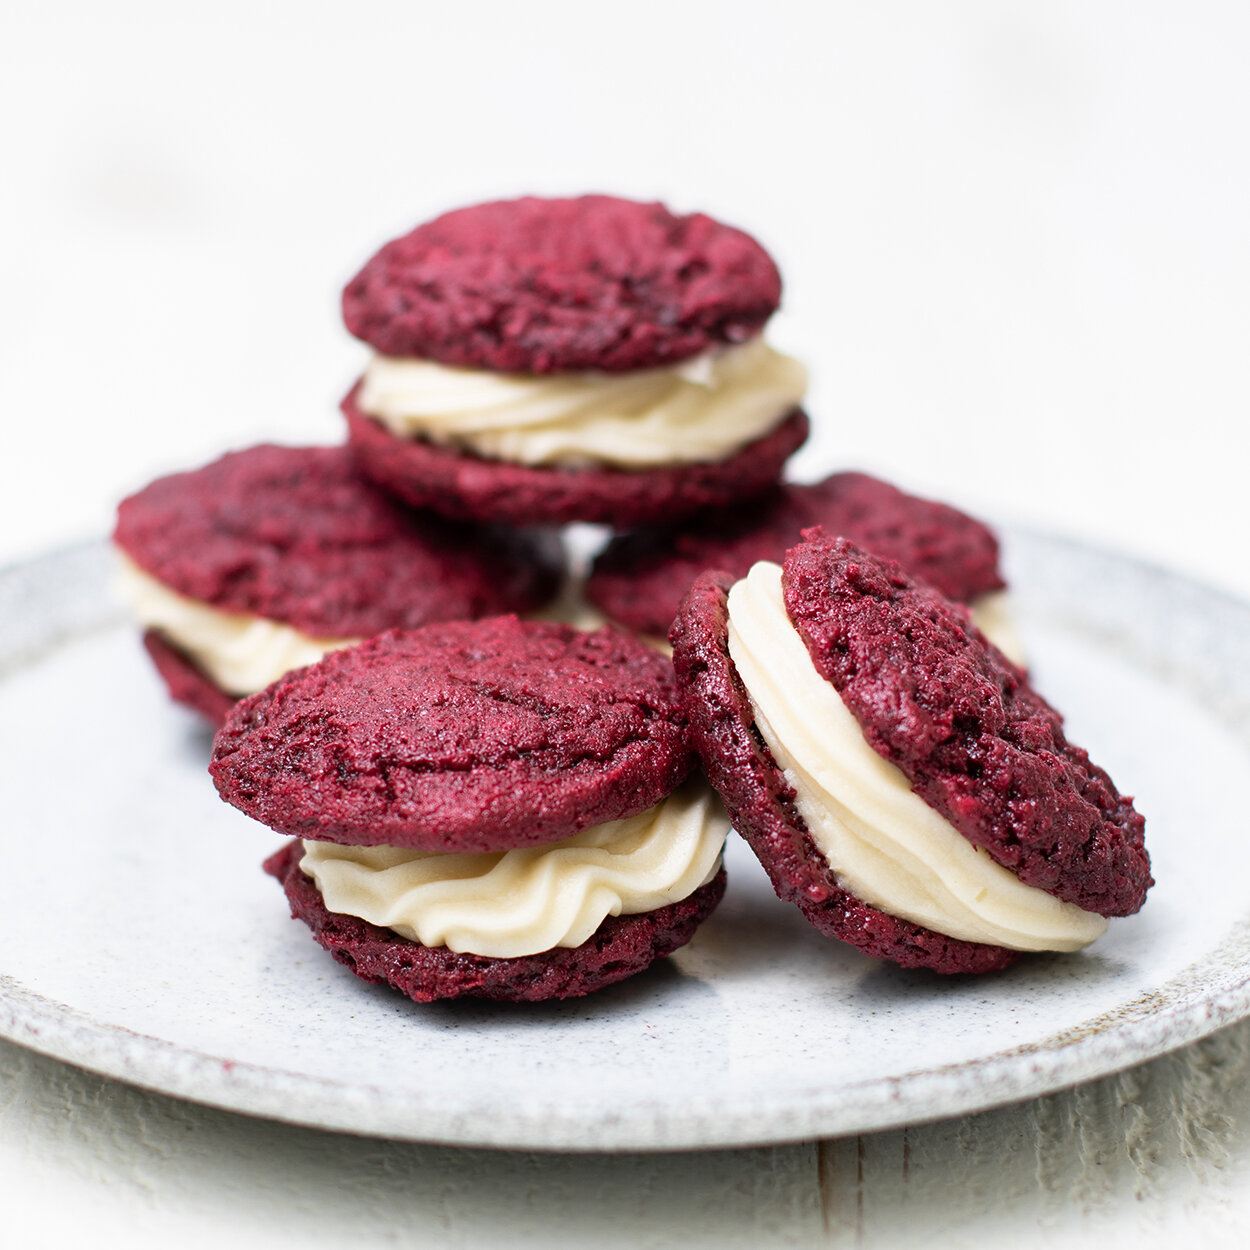
Red Velvet Whoopie Pies with Cream Cheese Filling | Gluten-free | Natural

Red Velvet Whoopie Pies

Red Velvet Whoopie Pies are fun for any season, especially around the holidays or as a Valentine's treat. This recipe makes it simple with artificial dye-free, plant-based red color.  

MAKES: 12

INGREDIENTS-COOKIES

2 cups 1:1 Bob's Red Mill gluten-free flour
1 tsp baking powder
4 tbsp non-alkalized cocoa powder
1 Color Kitchen Red Velvet Color Packet
¾ cup natural sugar
¼ cup brown sugar
½ cup butter, melted
1 egg
1 tsp vanilla extract
½ cup buttermilk or kefir
½ tsp salt

INGREDIENTS-CREAM CHEESE ICING (FILLING)

1 Color Kitchen Plain Frosting Mix
1 stick butter (room temp)
8 oz cream cheese (room temp)
1 tsp vanilla
a pinch of salt


DIRECTIONS-COOKIES

Preheat oven to 325°F.

Using a hand mixer, cream together softened butter and sugars.

Add in the egg, vanilla extract, and buttermilk. Beat on medium/high speed.

In a separate bowl combine the dry ingredients: flour blend, baking powder, cocoa powder, natural red velvet color, and salt.

Slowly add dry ingredients to wet and blend gently, but do not overmix.

Chill the cookie dough for at least an hour before baking or cookies may bake flat.

Bake cookies for 10-13 minutes. Cool on cookie rack before frosting.

DIRECTIONS-ICING (FILLING)

Put cream cheese and butter in mixing bowl and beat until creamy. Add vanilla and salt and blend. On low, slowly add powdered sugar and mix for 1 min, or until completely blended.

Put a scoop of filling between 2 cookies to make pies. Enjoy!


Red Velvet Lattice Pie Crust - Cranberry Blood Orange Pie | Natural | Dye-free

Cranberry Blood Orange Pie

A creative spin on a classic dish — who doesn’t love a homemade pie? Decorative, delightful and free of dye, this dessert checks all the boxes!

MAKES: 10 SERVINGS
Prep Time: 35 minutes
Chill Time: 2 hours
Cook Time: 50 minutes

Ingredients

PLAIN PIE CRUST
2 ½ cup all-purpose flour
1 cup (2 sticks) unsalted butter, cold
1 tbsp granulated sugar
1 tsp salt
4-8 tbsp water

RED PIE CRUST
1 ¼ cup all-purpose flour
1 Color Kitchen Red Velvet Color Packet
½ cup (1 stick) unsalted butter, cold
1 ½ tsp granulated sugar
½ tsp salt
2-4 tbsp ice water
1 egg for egg wash

FILLING
3 cups fresh cranberries
¼ cup granulated sugar
2 tsp blood orange zest
juice of ½ a blood orange
2 tbsp flour
¼ tsp salt

Orange Pie

Directions

Prepare the plain crust.  In a large bowl, whisk together the flour, sugar, and salt.  Using a pastry cutter or 2 forks, cut the butter into the flour mixture to create a coarse meal.  Add the water one tablespoon at a time and mix after each addition, until the dough forms large clumps and can be shaped into a ball.  Divide the dough in half.  Form each half into a disk, wrap with plastic wrap, and place in the refrigerator for at least 2 hours, up to overnight.

Prepare the red crust.  In a large bowl, whisk together the flour, sugar, red velvet color packet and salt.  Using a pastry cutter or 2 forks, cut the butter into the flour mixture to create a coarse meal.  Add the water one tablespoon at a time and mix after each addition, until the dough forms large clumps and can be shaped into a ball.  Form the dough into a disk shape, wrap with plastic wrap, and place in the refrigerator for at least 2 hours, up to overnight.

Prepare the filling.  Add all of the filling ingredients to a large bowl and toss until evenly distributed.

Preheat the oven to 450 degrees.

Roll out one disk of plain dough into a 10-inch circle.  Transfer it to a 9-inch pie plate and trim the edges.  Add the filling.

Roll out the red pie dough into a rectangle, about ⅛-inch thick.  Cut it into strips.  Arrange the strips over the pie.

Roll out the remaining plain pie dough into a rectangle, about ⅛-inch thick.  Cut it into strips.  Weave the plain dough strips with the red dough strips to create a lattice topping.

Beat the egg with 1 tablespoon of water.  Brush it over the top of the pie.

Bake the pie for 10 minutes at 450 degrees, then lower the oven temperature to 350 degrees and bake for an additional 40 minutes.  If the crust is becoming too brown, place a sheet of aluminum foil over the top of the pie. 

Let the pie cool for at least 15 minutes and serve with vanilla ice cream.


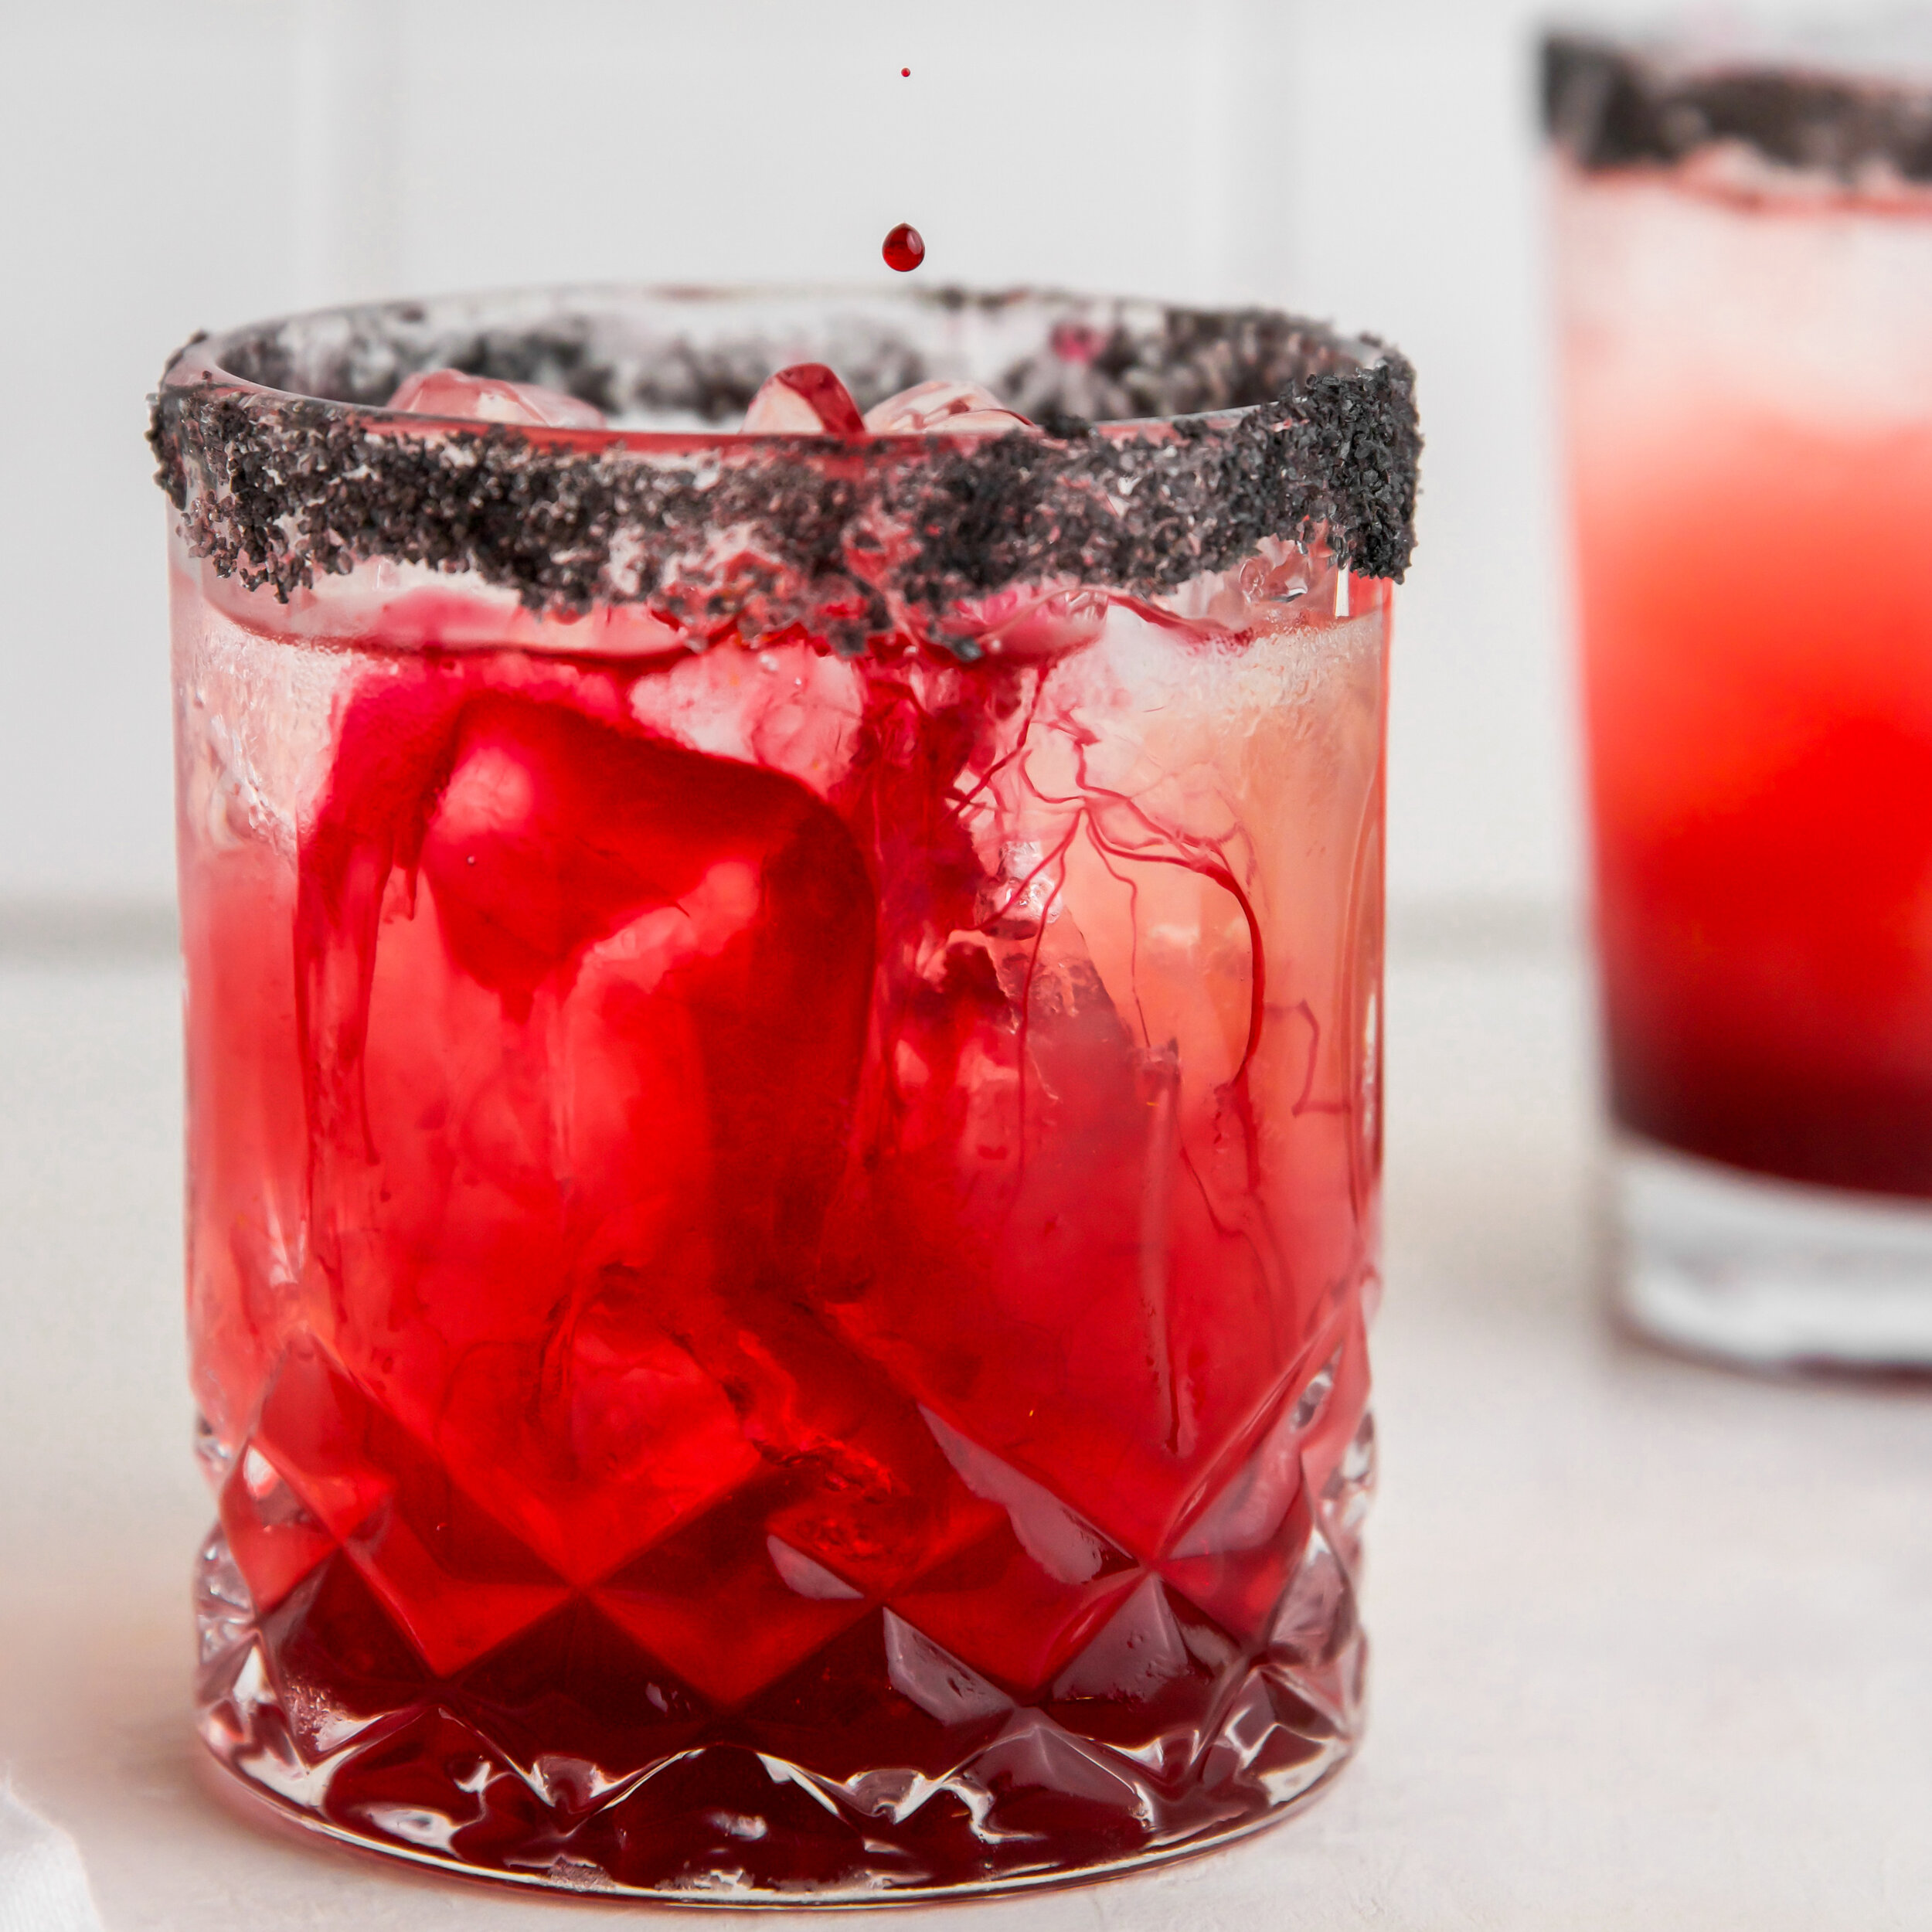
Vampire Cocktail | Natural Red | Dye-free

Vampire Cocktail

This vampire cocktail will make your blood run cold. Serve on Halloween as a cocktail or mocktail. And while the deep red color is dye-free, this drink is sure to spook your guests with sanguine sweetness!

MAKES: SYRUP FOR DOZENS OF DRINKS

INGREDIENTS

BLOOD SYRUP
½ cup agave syrup
1 Color Kitchen Red Velvet Color Packet

SUGAR RIM
¼ cup granulated sugar
1 tsp activated charcoal
1 wedge lime

COCKTAIL (INDIVIDUAL)
2 ounces vodka or tequila
2 ounces grapefruit juice
½ ounce lime juice
½ ounce blood syrup
2 ounces sparkling water
Ice

MOCKTAIL
To make alcohol-free and kid-friendly, replace the liquor with an extra ounce of sparkling water!

Vampire Cocktail

DIRECTIONS

BLOOD SYRUP
Combine the agave and red velvet color packet in a bowl and mix with a fork or spoon until evenly combined.

SUGAR RIM
In a small bowl, mix together the sugar and activated charcoal until evenly distributed. Rub a lime wedge along the rim of your glass, then dip it in the sugar mixture.

COCKTAIL
Fill a glass with ice, then pour in the liquor, grapefruit juice, lime juice, and sparkling water. Mix to combine.

Pour in the blood syrup. Stir lightly to keep the “blood” separated when serving. Stir to combine before drinking.

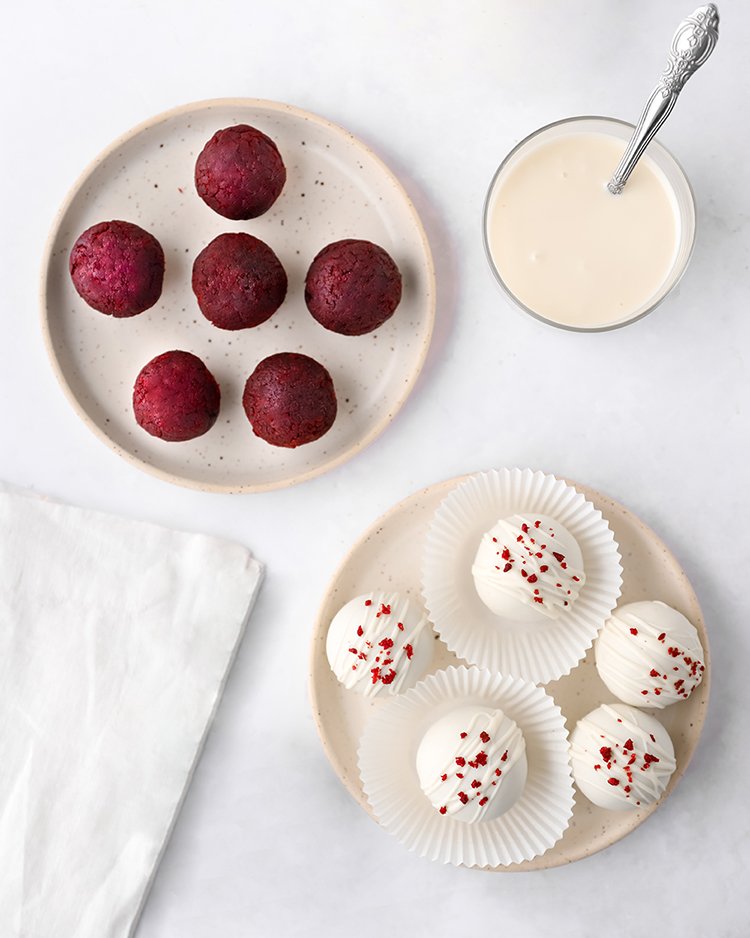
red velvet cake truffles | gluten-free | natural

red velvet cake truffles

These poppable, delectable Love Day treats are the perfect dessert after a romantic meal.

MAKES: 16-20 CAKE TRUFFLES
Prep Time: 40 minutes
Cook Time: 30 minutes

Ingredients

INGREDIENTS
½ cup butter (room temp)
1 ½ cup organic sugar
2 eggs
1 tsp vanilla
2 Tbsp cocoa powder
2-3 Tbsp ColorKitchen Red Velvet color (11-13 grams)
1 tsp salt
1 tsp baking powder
2 ½ cups flour
1 cup buttermilk
1 Tbsp vinegar
12 oz white chocolate candy melts
16-20 straws or lollipop sticks
1 styrofoam board

red velvet cake truffles

Directions

Heat oven to 350 degrees. Butter two 9-inch cake pans and lightly dust with cocoa powder.

Mix butter, sugar, eggs and vanilla.

In a separate bowl mix dry ingredients: flour, red velvet powder color, cocoa powder, baking powder and salt.

Add vinegar to buttermilk.

Slowly add dry blend into butter mixture along with buttermilk/vinegar.

Divide batter evenly between the two pans. Place pans on the middle rack of the oven. Bake for 25-30 minutes, until a toothpick inserted in the center comes out clean. Cool for 10 minutes

Empty the cake pans into a large bowl.  Use a fork or your hands to break up the cake and mash it into a dough.  Form the dough into 16-20 smooth 2 tablespoon- sized balls.  Place the balls in the fridge for 10 minutes

Place the white chocolate melts in a microwave-safe cup or bowl.  Microwave in 30-second increments, mixing after each increment, until completely melted.

Insert a straw or lollipop stick into one of the cake balls.  Dip the ball into the melted white chocolate to coat.  Push the cake pop stick into a styrofoam block to dry in an upright position.

Repeat with all of the cake balls.  Allow the balls to dry for at least 1 hour.  

Red Velvet Ice Cream | Dye-free | Natural

Red Velvet Ice Cream

Transform your plain vanilla ice cream into a chocolaty, tasty red velvet ice cream treat.

MAKES: 3-4 SCOOPS

INGREDIENTS

2 cups vanilla ice cream
1 Red Velvet Color Kitchen Color packet
3 tbsp yogurt
1 tbsp cocoa powder

DIRECTIONS

Add ice cream, red velvet color, yogurt and cocoa powder in blender and throughly mix. Enjoy as ice cream or a creamy milkshake.

Red Velvet Cake | Artificial Dye-Free

red velvet cake

Our plant-based Red Velvet Color can be mixed with cake mixes, or with recipes from scratch to make a deep, rich red velvety cake.

When baking from scratch, it’s important to substitute baking powder for baking soda, and to use a non-alkalized cocoa powder.

SUGGESTED USE: 1 packet (13 grams) red velvet powder to 1lb. dry cake mix.

INGREDIENTS

½ cup butter (room temp)
1 ½ cup organic sugar
2 eggs
1 tsp vanilla
2 tbsp cocoa powder (non-alkalized)
1 Red Velvet Color Kitchen Color packet (13 grams, 3 tbsp)
1 tsp salt
1 tsp baking powder
2 ½ cups flour
1 cup buttermilk
1 tbsp vinegar

DIRECTIONS

Heat oven to 350 degrees. Butter two 9-inch cake pans and lightly dust with cocoa powder.

Mix butter, sugar, eggs and vanilla.

In a separate bowl mix dry ingredients: flour, red velvet powder color, cocoa powder, baking powder and salt.

Add vinegar to buttermilk.

Slowly add dry blend into butter mixture along with buttermilk/vinegar.

Divide batter evenly into 2 pans. Bake for 25-30 min. Cool on rack before frosting.

Red Velvet Doughnut Glaze | Dye-free

Red Velvet Doughnut Glaze

Decadent, delightful and delicious — that’s what 1 dozen homemade red velvet donuts mean to us!

MAKES: GLAZE FOR 1 DOZEN

Red Velvet Doughnut Glaze

INGREDIENTS

2 cups powdered sugar
¼ cup whole milk
1 tsp vanilla extract
1 tbsp Red Velvet Color Kitchen Color

DIRECTIONS

In medium-sized bowl combine powdered sugar and red velvet color.

In medium saucepan mix milk and vanilla over low heat.

Sift in sugar and color mixture, whisking slowly.

Mix until all the sugar and color are dissolved.

Remove glaze from heat and place over a bowl of warmed water.

Dip tops of each doughnut separately in glaze and set on a rack to dry.

Red Velvet Pancakes | Natural Color

Red Velvet Pancakes

Enjoy a decadent breakfast with red velvety pancakes! Add our natural Red Velvet Color to any favorite pancake mix.

MAKES: 12-16 PANCAKES

Red Velvet Pancakes

INGREDIENTS

1 Pancake mix of your choice
Buttermilk or kefir
1 Color Kitchen Red Velvet Color Packet

DIRECTIONS

In a large bowl mix 1 box pancake mix with natural Red Velvet Color. Then combine with the recommended ingredients. Substitute buttermilk or kefir for milk or water.

Heat griddle on low and add oil to prevent sticking.

Scoop ¼ cup batter into pan and cook on low heat. Once bubbles form, flip and cook on second side for a 1-2 minutes. Avoid browning.

Top with raspberries or strawberries, fresh whipped creme and a raspberry syrup.

So delish!

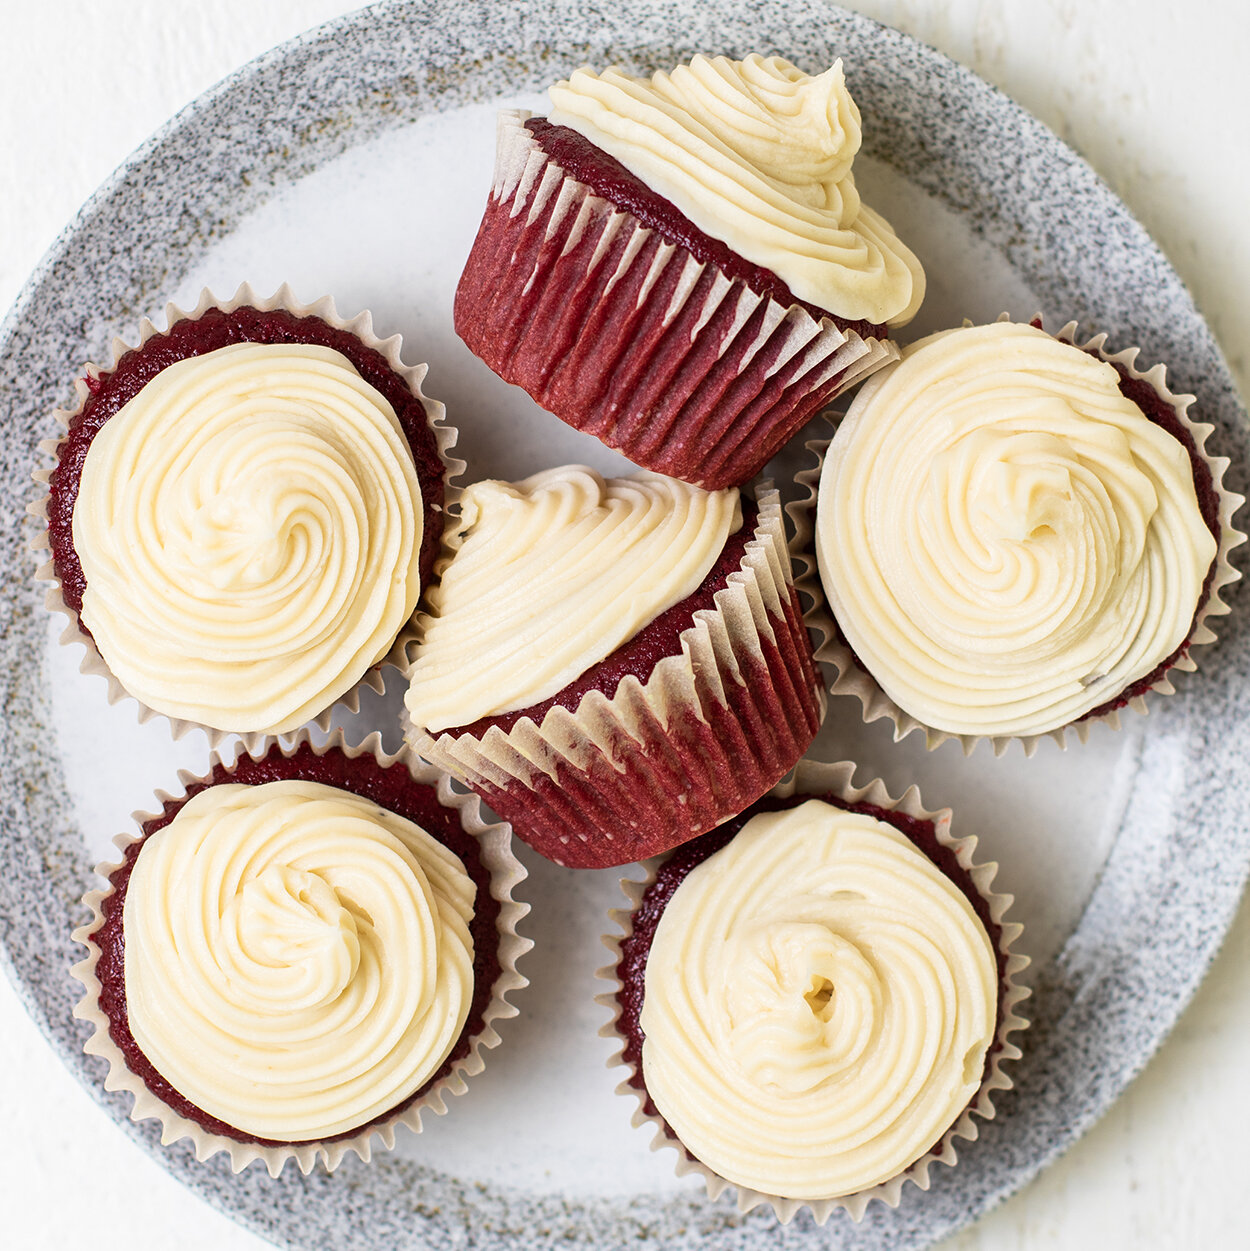
Red Velvet Cupcakes with Cream Cheese Frosting | Natural

Gluten-free Red Velvet Cupcakes

This recipe makes natural, red velvet cupcakes colored with artificial dye-free, plant-based red color. Add a little cream cheese to our Plain Frosting Mix with a few other basic ingredients and you’ve got your cupcakes served!

MAKES: 18

INGREDIENTS-CUPCAKES

½ cup butter (room temp)
1 ½ cup organic sugar
2 eggs
1 tsp vanilla
2 tbsp non-alkalized cocoa powder
2-3 tbsp ColorKitchen Red Velvet color (11-13 grams)
1 tsp salt
1 tsp baking powder
2 ½ cups flour
1 cup buttermilk
1 tbsp vinegar

INGREDIENTS-CREAM CHEESE FROSTING

1 Color Kitchen Plain Frosting Mix
1 stick butter (room temp)
8 oz cream cheese (room temp)
1 tsp vanilla
a pinch of salt


DIRECTIONS-CUPCAKES

Preheat oven to 325°F. Line 18 cupcake tins.

Mix butter, sugar, eggs and vanilla.

In a separate bowl mix dry ingredients: flour, red velvet powder color, cocoa powder, baking powder and salt.

Add vinegar to buttermilk.

Slowly add dry blend into butter mixture along with buttermilk/vinegar.

Fill each tin with batter ½ inch from top of liner. Bake for 15-20 min. Cool well before frosting with cream cheese frosting.

DIRECTIONS-FROSTING

Put cream cheese and butter in mixing bowl and beat until creamy. Add vanilla and salt and blend. On low, slowly add powdered sugar and mix for 1 min, or until completely blended.

Red Velvet Skillet Cookie Sundaes - Artificial Dye-free | Gluten-free

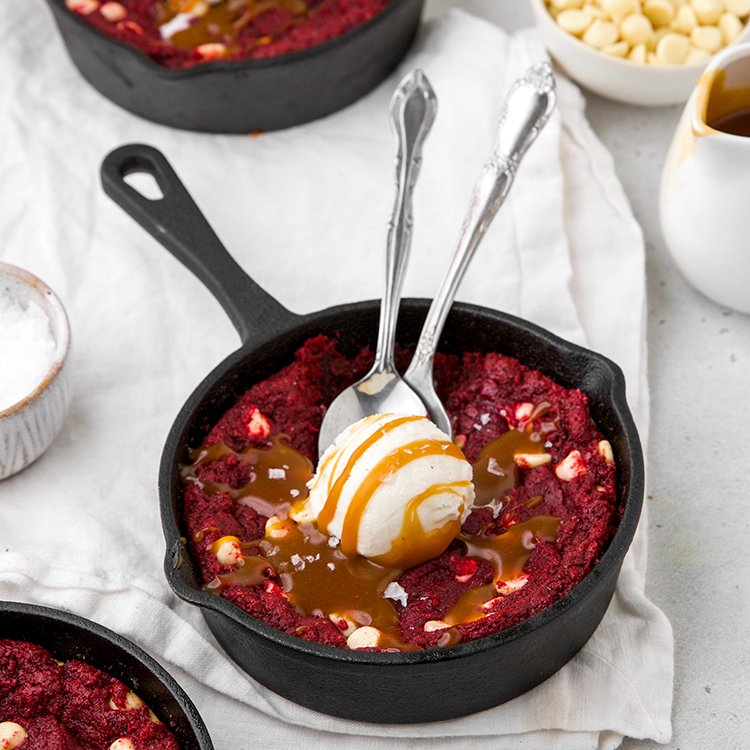
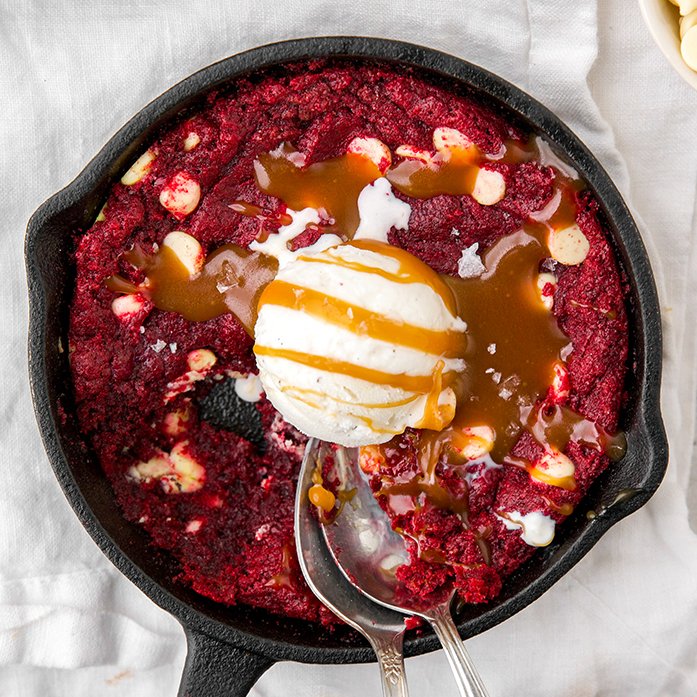
Red Velvet Skillet Cookie Sundaes

Baked in cast iron skillets, these gluten-free red velvet cookie pies are served warm, melting with white chocolate, caramel, and ice cream yumminess. A perfect holiday dessert for those cold nights, to be shared with those you love.

MAKES: 3 COOKIE PIES
Prep Time: 10 minutes
Cook Time: 30 minutes

INGREDIENTS

COOKIES
1 bag Color Kitchen Red Velvet Cookie Mix
1 egg (room temp)
1 tbsp buttermilk (or yogurt)
1 stick butter (softened), plus some for greasing the skillets
1 tsp vanilla
½ cup white chocolate chips

CARAMEL SAUCE
1 cup granulated sugar
1 stick butter
½ cup heavy whipping cream

TOP WITH
3 scoops vanilla ice cream

Red Velvet Skillet Cookie Sundaes

DIRECTIONS

Preheat the oven to 325 degrees and grease 3 mini cast iron skillets with butter.

Prepare the red velvet cookie dough according to the instructions on the package (vegan option available).  Fold in the white chocolate chips.

Divide the cookie dough evenly between the 3 skillets and press it into the bottom of the skillets.  Place the skillets in the refrigerator to chill for 15 minutes.

When the dough is done chilling, transfer the skillets to the oven and bake for 16 minutes.

While the skillet cookies are baking, prepare the caramel sauce. Heat sugar in a small skillet over medium heat, stirring constantly until it is totally melted.  The sugar will form clumps before beginning to melt.  Once the sugar melts, add the butter and stir until it is melted.  The mixture will sizzle up when the butter is added.  Don’t be alarmed, this is normal.  When the butter is melted, add the heavy cream (the mixture will sizzle up again) and stir until all of the ingredients are evenly combined.  Let the caramel simmer for 2 minutes, then remove from heat and let cool.

When the cookies are finished baking, let them cool for at least 10 minutes.

Once the cookies are finished cooling, top each one with a scoop of vanilla ice cream and drizzle with caramel sauce.

Naturally Red Frosting | Artificial Dye-free

Red Frosting

Color Kitchen’s natural Red Velvet Color creates a wonderfully natural bright red for frostings.

INGREDIENTS

1 pint frosting (handmade or store bought)
1 Red Velvet Color Kitchen Color packet
For color variation add Orange or Blue Color Kitchen Color packets (see mixing instructions below)

DIRECTIONS

If making frosting from scratch, blend color with dry ingredients before hydrating or mix color powder with a very small amount of water (approx ¼ tsp liquid to 1 ¼ tsp color) to make a paste.

For premade frosting, mix directly into frosting and mix until color is fully blended. Color will continue to saturate and intensify over the next day.

COLOR MIXING
For a fire engine red, add ½-1 packet Orange
For a purple add ½-1 packet Blue

Colored Decorative Sparkling Sugar | Artificial Dye-free

natural red sanding sugar

Thinking making sparkling sugar sounds hard? It really isn’t! Try our classic dye-free sparkling topping!

INGREDIENTS

1 or more Color Kitchen Color packets, for red use Red Velvet Color Kitchen Color packet
sparkling sugar (recommend Bob’s Red Mill Sparkling cane sugar)

DIRECTIONS

 ½-1 tsp color to 1 cup of sugar.

Place color powders in container with lid.

Add 1 to 2 drops of water, just enough to get the color to dissolve to a syrup consistency, and stir.

Place your cup of sugar in the bowl and cover with lid. 

Shake and turn for 1-2 minutes. Open the lid and check that all the sugar is covered with color.

Pour sugar on parchment paper and let completely dry overnight.

Place in airtight container and use for decorating cookies, cupcakes, and more!


Red Velvet Caramel Apples | Dye-free | Plant-based

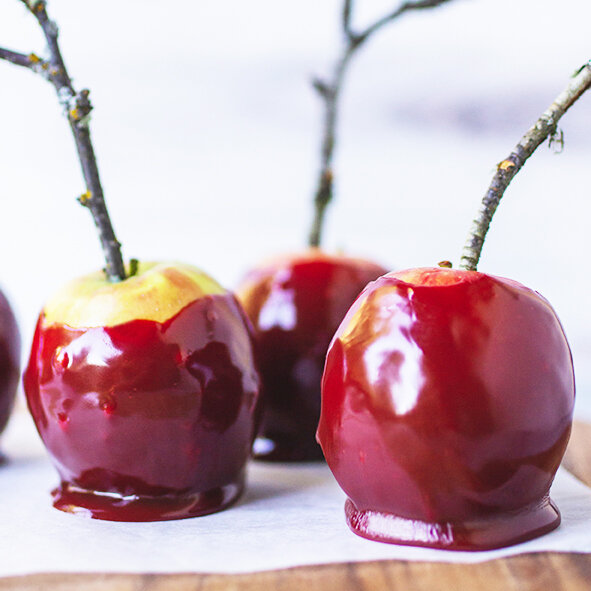
Red Velvet Caramel Apples

A naturally colorful and festive treat for the holidays, free from red dye 40!

MAKES: 6

INGREDIENTS

1 cup organic cane sugar
½ cup unsalted butter
¾ cup heavy cream
½ cup organic light corn syrup
1 tbsp molasses
1 tsp vanilla extract
½ tsp sea salt
1 Red Velvet Color Kitchen Color packet
6 apples
6 sturdy lollipop sticks (or small apple branches)

DIRECTIONS

Place sugar, butter, cream, corn syrup, molasses, vanilla, red velvet powder, and salt in a thick-bottomed 3 to 4-quart saucepan. Heat on medium and stir slowly with a wooden spoon until the butter has melted and the sugar has dissolved. If you see sugar crystals on the edge of the pan, brush them down with a wet pastry brush.

Let the caramel mixture come to a rolling boil, adjusting the heat so that the caramel doesn't boil over the pan. Continue to stir in a slow figure-eight pattern with a wooden spoon. Monitor the temperature of the caramel with a candy thermometer. When it reaches 240°F (after about 15 minutes or so of boiling), remove from heat and pour into a metal bowl. Let the hot caramel mixture cool to just below 200°F, at which point it’s time to dip the apples.

While the caramel sauce is cooking, line a baking sheet with Silpat or wax paper. Make sure apples are washed and dry, and put them in freezer for a few minutes. When ready to dip, insert the sticks into the center of the apples through the stem end. Swirl each apple around in the sauce so that the caramel sauce completely coats the apple, except for the very top near the stick. Let the caramel set, and serve!