Halloween

Black Chocolate & Orange Bundt Cake with Greek Yogurt | DYE-free

Black Chocolate & Orange Bundt Cake with Greek Yogurt

This Halloween or Thanksgiving, try our super rich and moist black chocolate cake recipe, made with Greek yogurt and natural ingredients. Topped with an artificial dye-free bright orange icing made easy with our Icing (frosting) Mixes.

MAKES: 1 BUNDT CAKE
Prep time: 15 minutes
Cook time: 45 minutes

Black Chocolate & Orange Bundt Cake with Greek Yogurt

INGREDIENTS

CAKE
1 cup (2 sticks) unsalted butter (plus some for greasing the pan)
1 cup whole milk
⅓ cup black Dutch-process cocoa powder
2 cups all-purpose flour
1 ¾ cup granulated sugar
1 ½ tsp baking powder
½ tsp salt
2 eggs
½ cup plain Greek yogurt

ICING
1 Color Kitchen Plain Icing (Frosting) Mix
3 tbsp milk or milk alternative
1 Color Kitchen Orange Color Packet
½ tsp natural orange extract

DIRECTIONS

Preheat the oven to 350 degrees and grease a 10-cup bundt pan.

In a small saucepan over medium heat, combine the butter, milk and cocoa powder. Mix over heat until the butter is melted and the cocoa powder has dissolved into the milk. Remove from heat.

Combine the dry ingredients. In a large bowl, whisk together the flour, sugar, baking soda and salt.

Add the butter and cocoa powder mixture to the dry ingredients and whisk to create a thick batter. Then add the eggs to the batter and whisk until smooth. Add the Greek yogurt to the batter and whisk one more time until all ingredients are evenly combined.

Pour the batter into the prepared bundt pan. Bake for 45-50 minutes, until a toothpick inserted in the center comes out clean. Allow the cake to cool in the pan for 20 minutes before inverting it onto a cooling rack.

While the bundt cake is cooling, prepare the orange icing. Add the frosting mix, milk, and orange extract to a large bowl and mix until smooth.

Once the cake is cooled, pour the icing on top.

Vampire Cocktail | Natural Red | Dye-free

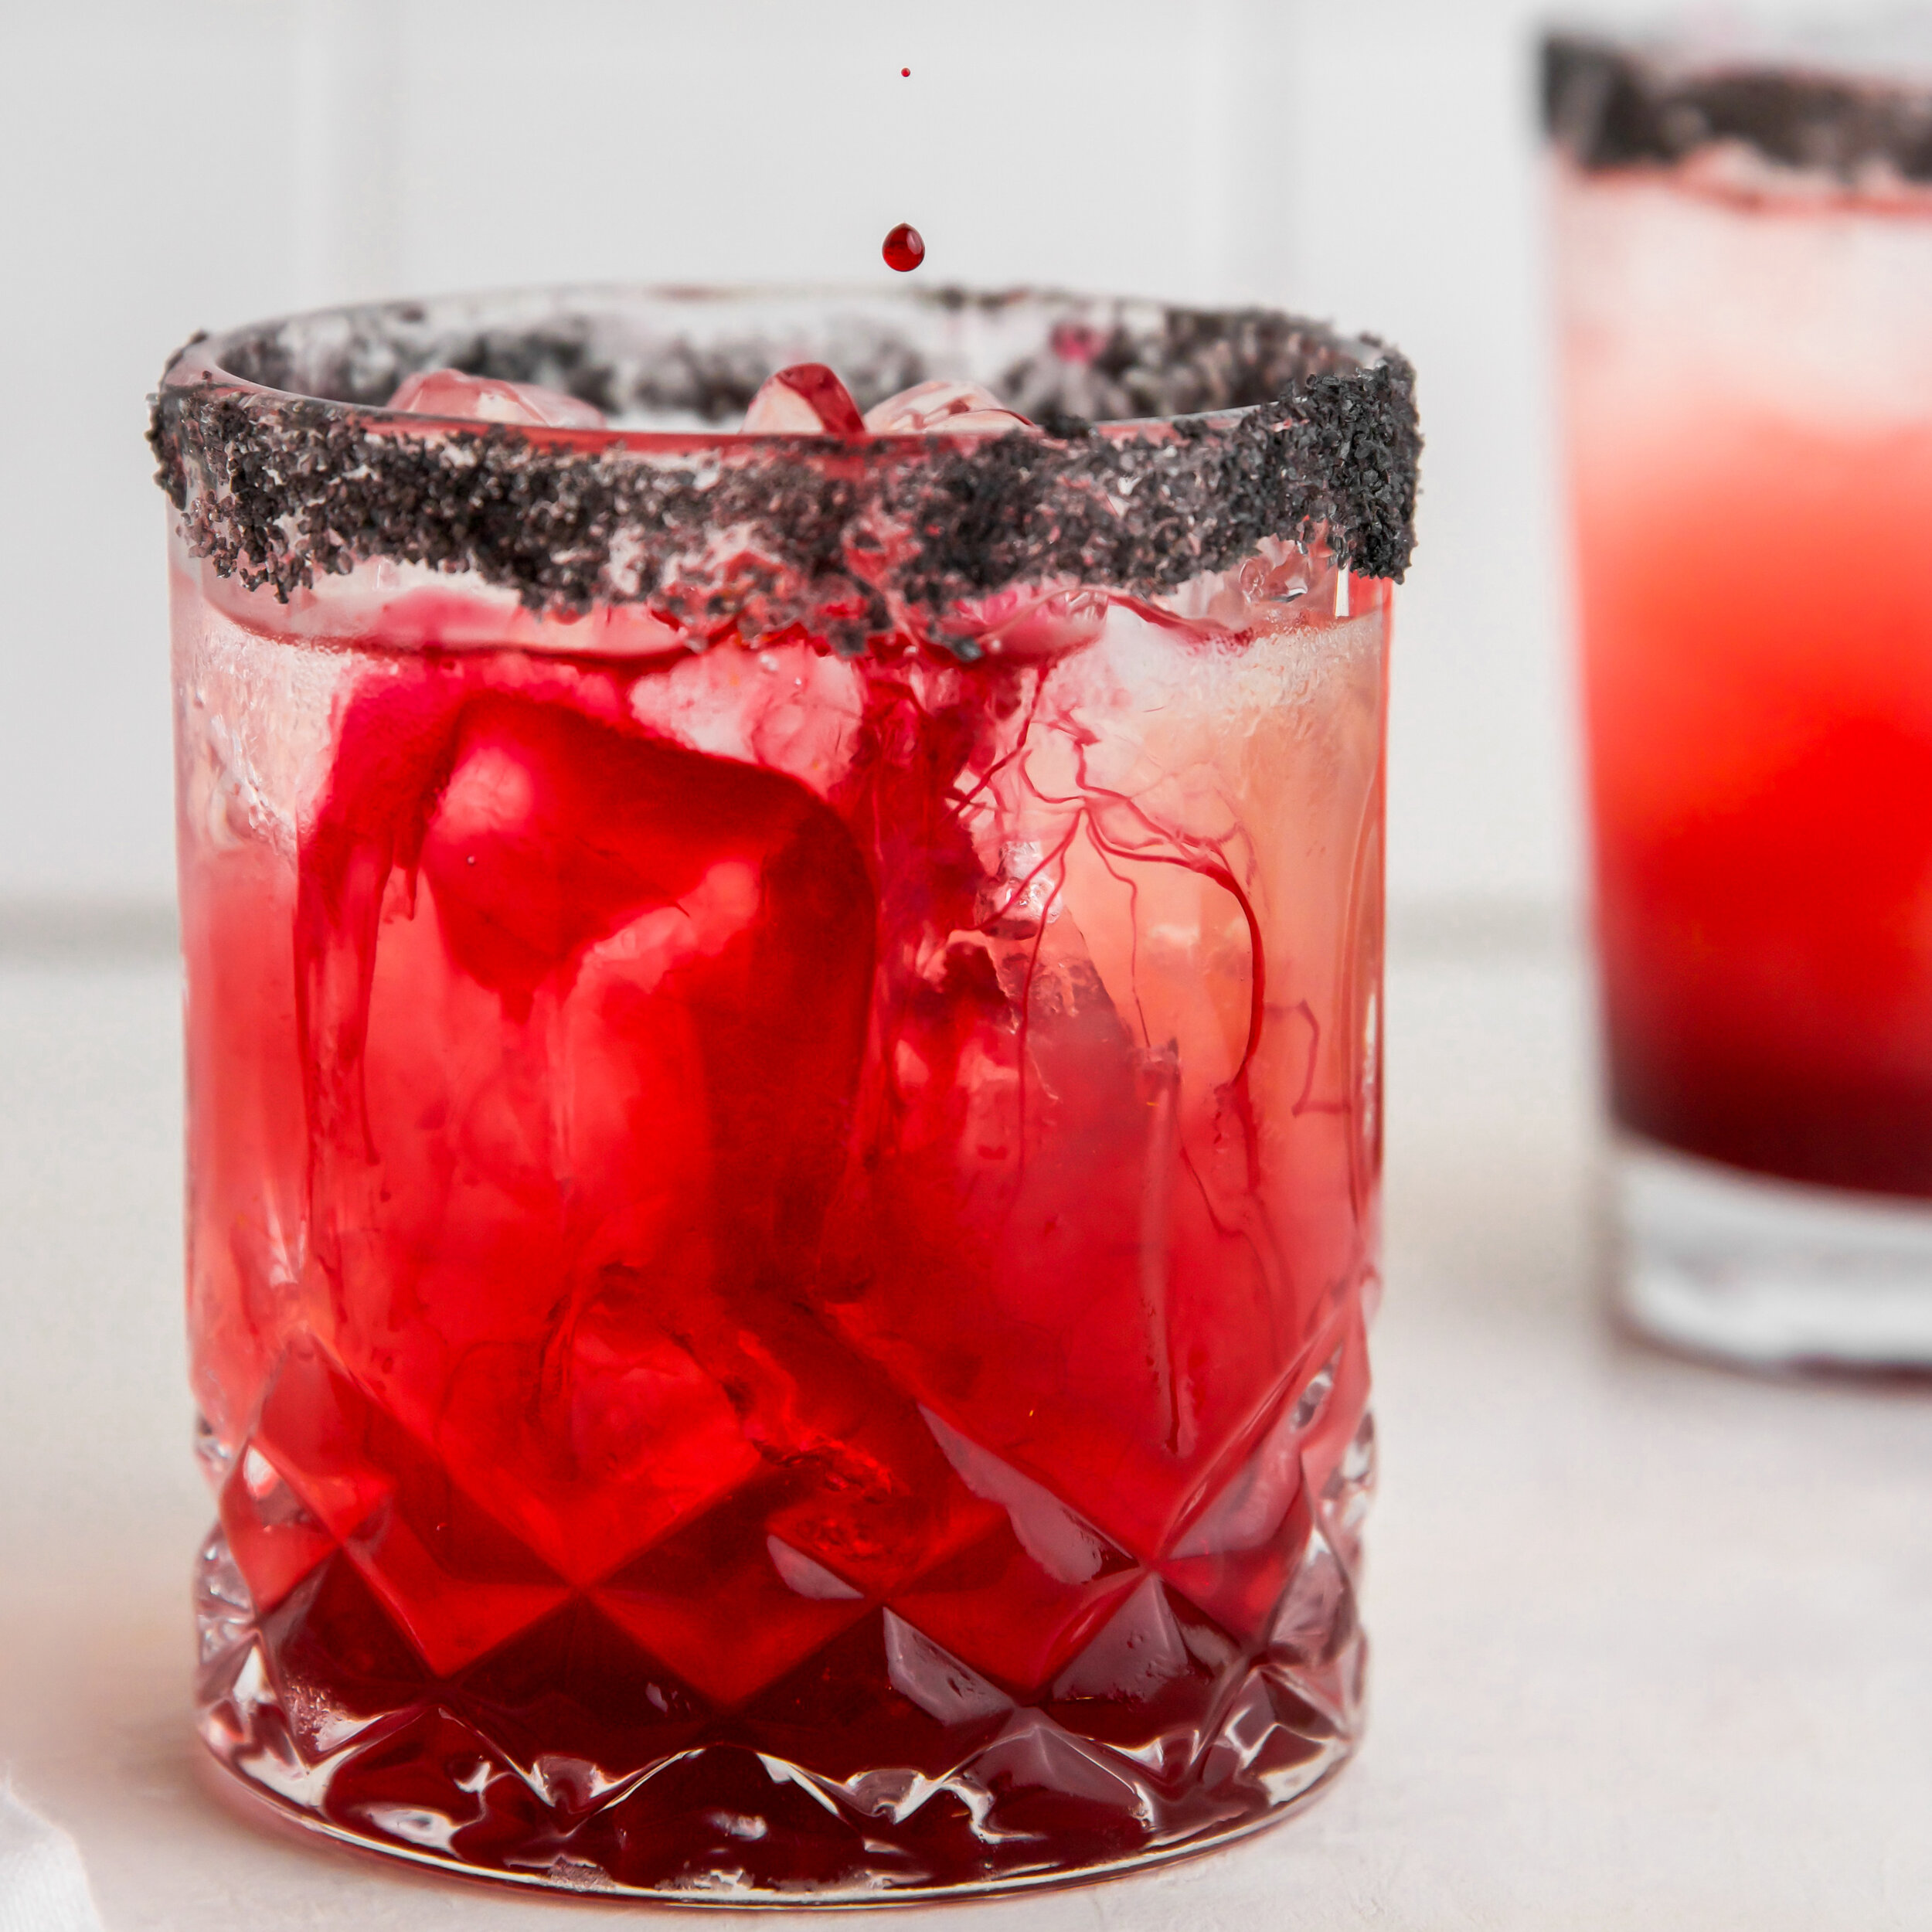
Vampire Cocktail

This vampire cocktail will make your blood run cold. Serve on Halloween as a cocktail or mocktail. And while the deep red color is dye-free, this drink is sure to spook your guests with sanguine sweetness!

MAKES: SYRUP FOR DOZENS OF DRINKS

INGREDIENTS

BLOOD SYRUP
½ cup agave syrup
1 Color Kitchen Red Velvet Color Packet

SUGAR RIM
¼ cup granulated sugar
1 tsp activated charcoal
1 wedge lime

COCKTAIL (INDIVIDUAL)
2 ounces vodka or tequila
2 ounces grapefruit juice
½ ounce lime juice
½ ounce blood syrup
2 ounces sparkling water
Ice

MOCKTAIL
To make alcohol-free and kid-friendly, replace the liquor with an extra ounce of sparkling water!

Vampire Cocktail

DIRECTIONS

BLOOD SYRUP
Combine the agave and red velvet color packet in a bowl and mix with a fork or spoon until evenly combined.

SUGAR RIM
In a small bowl, mix together the sugar and activated charcoal until evenly distributed. Rub a lime wedge along the rim of your glass, then dip it in the sugar mixture.

COCKTAIL
Fill a glass with ice, then pour in the liquor, grapefruit juice, lime juice, and sparkling water. Mix to combine.

Pour in the blood syrup. Stir lightly to keep the “blood” separated when serving. Stir to combine before drinking.

Pumpkin Orange Spice Pop Tarts | Natural

Pumpkin Orange Spice Pop Tarts

Who doesn’t love poptarts? Pumpkin spice? Combine these two cult favorites and get the most delectable treat, ever!

MAKES: 8 POP TARTS
Prep time: 25 minutes, Cook time: 25 minutes, Chill time: 1 hour 

INGREDIENTS

DOUGH
2 ½ cups all-purpose flour
1 tsp salt
1 tbsp sugar
1 cup (2 sticks) unsalted butter, cold
4-6 tbsp ice-cold water
1 egg (for egg wash)

FILLING
½ cup pumpkin purée
3 tbsp brown sugar
½ tsp pumpkin spice
1 egg

ICING
1 Color Kitchen Plain Icing (Frosting) Mix
3 tbsp milk or milk alternative
1 Color Kitchen Orange Color Packet
½ tsp natural orange extract (optional)

DIRECTIONS

 In a large bowl, whisk together the flour, sugar, and salt. 

Using a pastry cutter or two forks, cut the butter into the flour mixture to create a coarse meal.  Add the water, one tablespoon at a time, and stir with a wooden spoon after each addition until the mixture comes together in a crumbly dough. 

Pumpkin Orange Spice Pop Tarts

Divide the dough in half and form each half into a disk.  Wrap the disks in plastic wrap and chill for at least 1 hour.

While the dough is chilling, prepare the filling.  Combine all filling ingredients in a medium bowl and whisk until evenly combined.

Preheat the oven to 350 degrees and line a baking sheet with parchment paper.

When the dough is done chilling, roll each disk into a large rectangle, about ⅛ inch thick. Cut 8 even rectangles from each dough disk (16 rectangles total).

Place 8 rectangles on the baking sheet. Spoon a dollop of filling on each of the 8 rectangles, then place another rectangle of dough on top.  Crimp the edges with a fork. Use a knife to poke a few holes on top of each pop tart.

Whisk an egg with a tablespoon of water to create an egg wash.  Brush the egg wash over each pop tart.

Bake the pop tarts for 20-25 minutes, until golden brown.

While the pop tarts are cooling, make the icing. Combine powdered sugar and color in a large bowl and blend. Then whisk in the remaining ingredeints until combined.

 Spoon some icing onto each pop tart, and top with sprinkles. Allow icing to dry before enjoying.

Halloween Cupcakes | Artificial Dye-free

Hallowwen Cupcakes

These sweet treats will WOW every party table! Get creative with your decorating and let the kids join the fun!

MAKES: 2 ½ CUPS FROSTING

INGREDIENTS

BUTTERCREAM
1 cup (2 sticks) unsalted butter at room temperature
1 lb confectioners’ sugar
Pinch salt
1 tsp pure vanilla extract
2 tbsp milk, at room temp

 COLOR
1 Orange Color Kitchen Color packet
1 Green Color Kitchen Color packet
1 tbsp Black cocoa

DECORATE
Cadbury’s chocolate fingers, or mini peanut butter cups
Mini chocolate chips
Piping tips: medium closed star tip (Ateco 845) , medium flat tip (Wilton 45), size 1 round tip
Candy eyeballs

Orange Cupcakes

DIRECTIONS

Start with your favorite cupcake recipe.

Make buttercream. Using an electric mixer or stand mixer (with paddle attachment), in a large bowl, beat butter, sugar, and salt on low speed until incorporated. Increase speed to medium and beat to dissolve the sugar, 2 minutes. Add vanilla and milk mix until just combined. The buttercream should be soft but firm enough to pipe.

To make black buttercream, place black cocoa in a small bowl and combine with water (about 2 tsp) to make a smooth paste. Mix with ½ cup buttercream and transfer to a piping bag fitted with a small round tip.

To make Frankenstein, spread cupcakes with green buttercream. Holding the cupcake at an angle, dip the top ⅓ of cupcake in a bowl of mini chocolate chips to coat. Fit a piping bag with a small round tip and fill with black buttercream to pipe eyes, nose, mouth and scars. Use small pieces of chocolate finger cookies or mini peanut buttercups and gently press into sides of face for the bolts.

Mummy Cupcake

To make pumpkins, fill a piping bag fitted with a medium closed star tip (such as Ateco 845) with orange buttercream. Pipe four curved lines the length of the cupcake, finishing in a point at one end. Place chocolate cookie or peanut butter cup for the pumpkin stem. Fit a piping bag with a small round tip and fill with green buttercream. Pipe pumpkin vines around the stem.

To make a mummy pumpkin, spread cupcakes with orange buttercream. Place a chocolate cookie or mini peanut butter cup for a stem. Fit a piping bag with a small round tip and fill with black buttercream to pipe triangular, nose and zig-zag mouth. Fit a new piping bag with a flat tip (Wilton 45) and fill with white buttercream. Pipe over the cupcake in a zigzag pattern, leaving gaps so you can see underneath. Place two candy eyeballs for the eyes on top. 

To make skeleton, spread cupcakes with white buttercream. Fit a piping bag with a small round tip and fill with black buttercream to pipe a mouth, heart-shaped nose, slanted eyes and eyebrows.

 ~Anna Helm Baxter


Halloween ‘Oreo’ Monster Sandwich Cookies | Dairy Free | Gluten-free | Low Glycemic | Vegan-friendly

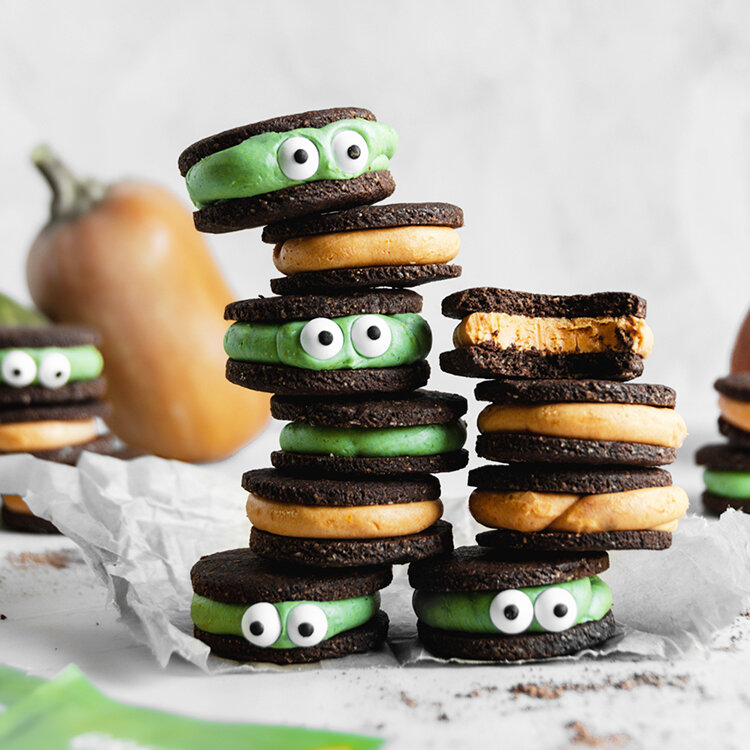
Halloween ‘Oreo’ Monster Sandwich Cookies

It’s like the double stuffed holiday oreos, but like, a million times better…

MAKES: 20 COOKIES, 10 SANDWICHES

INGREDIENTS

COOKIE
½ cup oat flour
½ cup almond flour
½ cup cacao or unsweetened cocoa powder (the darker cocoa the better)
5 tbsp of coconut sugar
¾ tsp baking powder
⅛ tsp sea salt
¼ cup of melted coconut oil (plus 1 tbsp)
3 tsp of maple syrup
1 egg room temperature, or sub for flax egg 

FILLING
4 tbsp of plant-based butter or regular butter
1 cup powdered sugar (make unrefined powdered sugar by putting any granulated sweetener in the blender for 30 seconds)
¾ tsp vanilla extract
1 tbsp of non dairy milk
1 Orange Color Kitchen Color packet
1 Green Color Kitchen Color packet

DIRECTIONS

COOKIE 
Preheat the oven to 350ºF and line a baking sheet with parchment paper

Combine all ingredients together except for the coconut oil, maple syrup, and the egg

Now melt ¼ cup of coconut oil to warm, not hot, and add to the dry ingredients. Combine and then add in the maple syrup and room temperature egg until a dough forms. If the dough still crumbles and does not form a solid dough when rolled into a ball, add another tablespoon of coconut oil.

Refrigerate for 15 minutes until dough chills.

Now take out the dough, roll into a ball and place between two pieces of parchment or wax paper. Using a rolling pin, roll the dough out to about ⅛” thickness, or however thick you want your cookies. But ⅛” is true to an Oreo. If they’re thicker they may have to bake for an extra 1-2 minutes.

Using a 1 ¼” (or close to that size) circle cookie cutter, or top of a glass (get creative with what you can use)! Cut out small circles and place them on the lined baking sheet. Repeat this process with the extra dough until it is all used. Place the circles on your baking sheet. It should make 18-20 cookies.

Bake for 8-10 minutes. Let cool on the baking sheet for a few minutes so they do not break when you transfer them, and then move them to a cooling rack to cool completely. 

Orange Hallowwen Cookies

FILLING
Your cookies must be cool before you frost them! And you will need a hand mixer to make the frosting.

First, soften your butter in the microwave. You can do this by putting the microwave on defrost setting and placing the butter in there for 30 second increments until just soft.

Now mix this butter with a hand mixer until it gets soft and fluffy. Add in your powdered sugar and keep mixing until the clumps are mixed in.

Mix in your vanilla and milk for about 1-2 minutes until it becomes a frosting consistency.

Divide your frosting in half in two bowls. Add one packet of Color Kitchen Foods Orange color powder to one of the frosting bowls and mix thoroughly until combined. Now do the same with the Green color powder.

MAKE THE COOKIES
I used a piping bag to squeeze the icing on the cookies, it gives them a smooth edge. But you can frost them on as well. I did about 2 tsp of frosting per cookie. Spread it out evenly and then smoosh the cookie down a bit with the top half of the other cookie.

Place in the fridge for 30 minutes or freezer for about 15 minutes, to set. Store in the refrigerator or freezer, the icing may get soft at room temperature.

Enjoy!

~Gutsy Baker, Stephanie Charbonneau

Halloween Rice Crispy Treats with Simple Ingredients | Natural | Dye-free

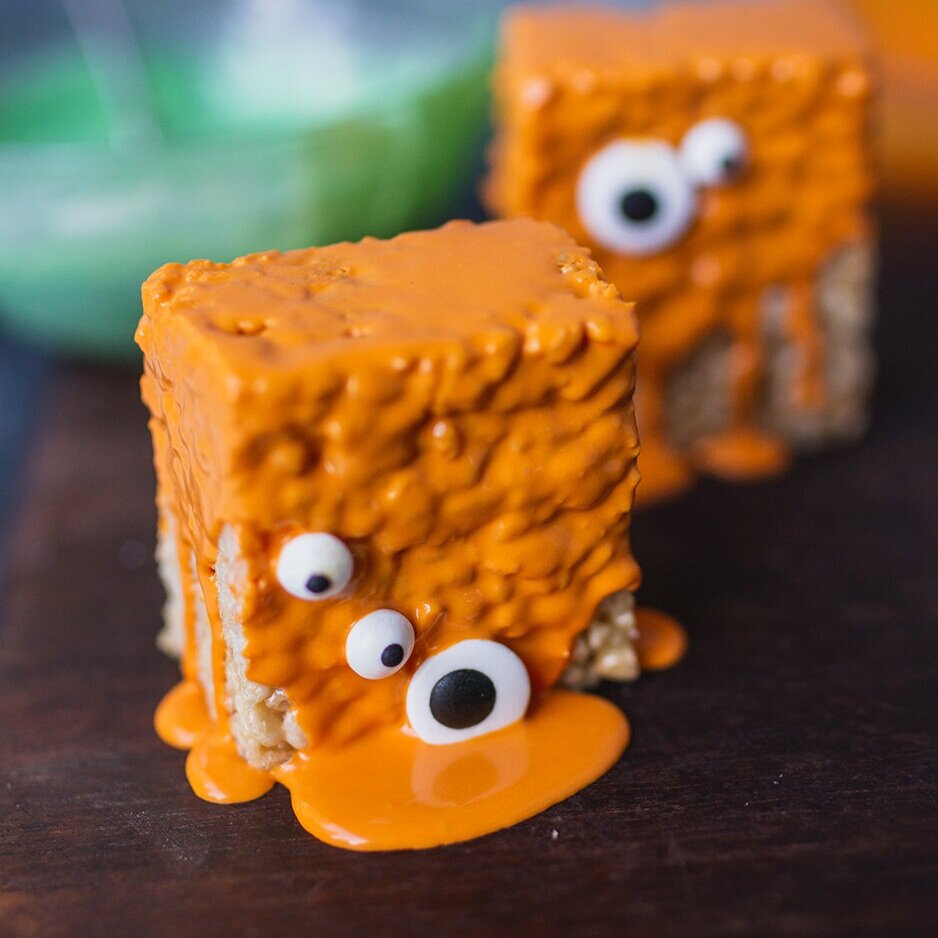
Orange Rice Crispie Treats

A classic crowd pleaser that is truly a quick and easy bake!

INGREDIENTS

RICE CRISPY TREATS
¾ cup butter
2, 10 ounce bags of mini marshmallows (11 cups)
½ tsp vanilla extract
9 cups rice crispy cereal

GLAZE
2 ¼ cups powdered sugar
whole milk
vanilla extract
1 Orange Color Kitchen Color packet
1 Green Color Kitchen Color packet
1 Blue Color Kitchen Color packet (to make purple)
1 Pink Color Kitchen Color packet (to make purple)


DIRECTIONS

CRISPY TREATS

Thoroughly grease a 9×13 inch baking pan.

In a large non-stick pot, melt butter over low-medium heat. Add marshmallows and stir until melted.

Remove from heat and mix in vanilla.

Add rice cripsy cereal, stir and coat but do not over mix.

Grease spatula and spread mixture into pan evenly.

Let cool completely for a couple hours. When cooled make glaze.

Halloween Rice Crispite Treats

NATURALLY COLORFUL GLAZE

Divide powdered sugar into 3 medium sized bowls, approximately ¾ cup each. Mix powdered sugar with a spoon and break apart any clumps in the sugar.

Add Orange to one bowl, Green to second bowl, and Blue and Pink to third to make Purple.

Add 2 ½ tsp milk and ¼ tsp vanilla to each bowl and blend with a spoon. If too thick add ½ tsp more milk at a time until lightly runny. Stir until all the sugar and color is dissolved.

DECORATE

Using spatula, remove crispy treats from pan and place on a cutting board. Cut into even sized squares.

Cover baking tray with parchment paper.

Dip squares into glaze bowls and then turn over on clean side to dry, letting the icing drip down the sides.

Decorate with eyes or other Halloween spooky goodies.

Let glaze dry for several hours.

Hocus Pocus Spellbook Brownies | Grain Free | Low FODMAP Friendly

Hocus Pocus Spellbook Brownies

MAKES - 9 brownies

INGREDIENTS

BROWNIES
6 tbsp tapioca flour
4 tbsp unsweetened cocoa or cacao powder
12 oz dark chocolate, coarsely chopped
6 tbsp coconut oil
4 large eggs
⅔ cup granulated monk fruit sweetener 
½ cup coconut sugar
1 tsp kosher salt
2 tsp vanilla extract

FROSTING
⅓ cup butter or vegan butter
3 cups Paleo powdered sugar**
1 ½ tsp vanilla extract
1-2 tbsp plant based milk
1 Orange Color Kitchen Color packet
½ Pink Color Kitchen Color packet + ½ Blue Color Kitchen Color packet

**You can use confectioner’s sugar or DIY your own Paleo sugar if on a reduced sugar diet. Simply add 3 cups of granulated sweetener of choice (I use monk fruit) to a blender and pulse for 30-40 seconds)

ADDITIONAL DECORATIONS
Edible candy eyes
Color Kitchen Rainbow Sprinkles

EQUIPMENT NEEDED
8x8 Brownie Pan
Cooling Rack
Electric or Stand Mixer preferable
2 clear piping bags
Small round + small star piping tips

DIRECTIONS

BROWNIES
Pre-heat oven to 350°. Line an 8×8″ baking dish with parchment paper (easiest if you use 2 pieces of parchment that overlap and leave a 3” overhang on the sides)

Whisk tapioca flour and cocoa powder in a medium bowl until no lumps remain. 

Heat chocolate and coconut oil in a small saucepan over low, stirring, until melted and smooth. DO NOT bring to a boil!

Using an electric mixer on medium-high speed, beat eggs, granulated monk fruit, and coconut sugar in a large bowl until light + smooth, about 3–4 minutes. 

Beat in salt and vanilla to combine, then beat in chocolate mixture, scraping down sides as needed, until incorporated. 

Beat in tapioca flour mixture, then increase speed to medium-high and beat until mixture is thick and holds its shape, about 30 seconds.

Pour into parchment lined baking pan + bake until a cake tester or toothpick comes out clean, approximately 20-25 minutes.

FROSTING
Prepare the frosting while the brownies bake.

In a medium bowl, beat butter, powdered sugar and vanilla on medium until fully incorporated. Add milk 1 tbsp at a time until frosting texture is thick + creamy. You do not want to add too much milk as your frosting will be soupy.

Divide frosting into two bowls. Using separate spoons, fold in coloring packets, mixing to fully combine.

Grab your piping bags and make a snip on each end about ¼” up from the bottom. Insert the small round tip in one bag and the small star tip in the other.

Hocus Pocus Spellbook Brownies

Add orange frosting to the piping bag with the small round tip by spooning it into the bag and gently squeezing until frosting is able to make its way through the tip.

Repeat for the purple frosting.

Once brownies have finished baking, allow them to fully cool before decorating. Place on a cooling rack in the fridge for 20-30 minutes to speed up the process.

When brownies are fully cooled, slice into 9 squares and prepare to decorate!

DECORATE
Take one candy eye and pipe a small dollop of orange frosting on the back. Press candy eye onto brownie. It’s ok if you push down a bit to help it stay secure. If you have tweezers, they will be helpful for this step but they are not necessary.

Next, take your orange piping bag + pipe out two loops, almost like a pretzel shape, on the top and bottom right hand corners.

Along the left side, pipe two parallel lines of orange, then a squiggle down the middle. This doesn’t have to look perfect, make sure you’re having fun!

Then, take your purple piping bag and pipe a circle around the eye. 

Add two dots of purple frosting to the center of each “pretzel” shape + a few more dots around the surface of the “book”. To make this simpler, but gentle pressure on the piping bag, press down lightly into the brownie, and pull straight up.

Lastly, just for fun, add some sprinkles to the “spine” of the book and voila! You have made Hocus Pocus Spellbook Brownies!


~Kimberly Cauti @prettydeliciouslife


Fall Candy Corn Pancakes | Natural | Artificial dye-free

Fall Candy Corn Pancakes

An easy, fun, healthy Fall or Halloween breakfast!

INGREDIENTS

PANCAKES
any pancake mix or recipe from scratch
1 Yellow Color Kitchen Color packet
1 Orange Color Kitchen Color packet
maple syrup
Yum Earth Candy Corn (optional)

WHIPPED CREAM
⅓ cup powdered sugar
1 ¼ cup heavy cream
1 tsp vanilla

DIRECTIONS

WHIPPED CREAM
Chill a medium-sized bowl in the freezer for at least 10 minutes.

Add heavy cream, sugar and vanilla extract.

Beat with an electric mixer on high speed until stiff peaks form. Keep in refrigerator until pancakes are ready.

PANCAKES
Make pancake mix according to instructions.

Once mixed, split into 2 bowls equally. Add Yellow color to one bowl and Orange to the other and blend fully until all the color is dissolved.

Use low heat to make pancakes.

Let cool slightly and top with whipped cream, syrup and candy corn.

0 Likes

Red Velvet Caramel Apples | Dye-free | Plant-based

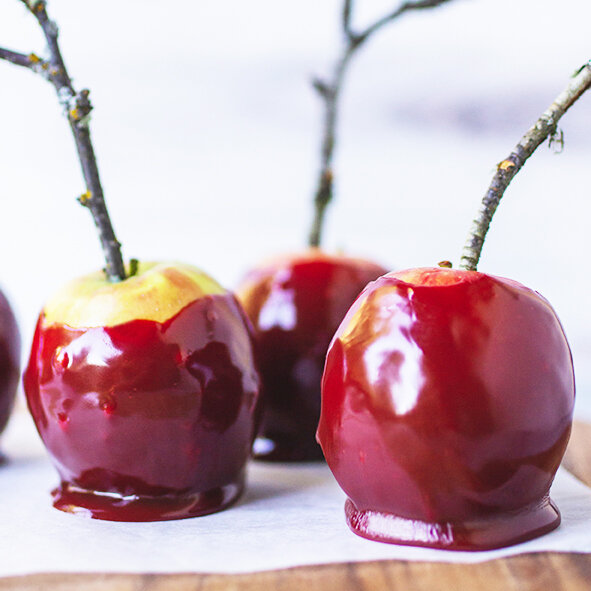
Red Velvet Caramel Apples

A naturally colorful and festive treat for the holidays, free from red dye 40!

MAKES: 6

INGREDIENTS

1 cup organic cane sugar
½ cup unsalted butter
¾ cup heavy cream
½ cup organic light corn syrup
1 tbsp molasses
1 tsp vanilla extract
½ tsp sea salt
1 Red Velvet Color Kitchen Color packet
6 apples
6 sturdy lollipop sticks (or small apple branches)

DIRECTIONS

Place sugar, butter, cream, corn syrup, molasses, vanilla, red velvet powder, and salt in a thick-bottomed 3 to 4-quart saucepan. Heat on medium and stir slowly with a wooden spoon until the butter has melted and the sugar has dissolved. If you see sugar crystals on the edge of the pan, brush them down with a wet pastry brush.

Let the caramel mixture come to a rolling boil, adjusting the heat so that the caramel doesn't boil over the pan. Continue to stir in a slow figure-eight pattern with a wooden spoon. Monitor the temperature of the caramel with a candy thermometer. When it reaches 240°F (after about 15 minutes or so of boiling), remove from heat and pour into a metal bowl. Let the hot caramel mixture cool to just below 200°F, at which point it’s time to dip the apples.

While the caramel sauce is cooking, line a baking sheet with Silpat or wax paper. Make sure apples are washed and dry, and put them in freezer for a few minutes. When ready to dip, insert the sticks into the center of the apples through the stem end. Swirl each apple around in the sauce so that the caramel sauce completely coats the apple, except for the very top near the stick. Let the caramel set, and serve!