Holiday

Red Velvet Cookies with White Chocolate and Sea Salt | Gluten-free | Natural

Color Kitchen Red Velvet Cookies 4

Using our natural Red Velvet Color, create delicious red velvet cookies with white chocolate, topped with sea salt.

MAKES: 24 COOKIES

Color Kitchen Red Velvet Cookies

INGREDIENTS

1 ½ cups gluten-free all-purpose flour
¼ tsp xanthan gum (if not already in flour blend)
¼ cup non-alkalized cocoa powder
1 Color Kitchen Red Velvet Color Packet
1 tsp baking powder
¼ tsp salt
½ cup butter, room temperature
¼ cup natural sugar
¾ cup packed brown sugar
1 egg, room temperature
1 tbsp buttermilk milk
2 tsp pure vanilla extract
white chocolate chunks
coarse sea salt

VEGAN SUBSTITUTIONS: Replace egg with 3 tbsp aquafaba, buttermilk with vegan yogurt, butter with ½ cup vegan butter and vegan white chocolate.

DIRECTIONS

Preheat oven to 325 degrees.

In medium-sized bowl, combine dry ingredients. In a larger bowl, add egg, buttermilk, and vanilla and mix with a hand or stand mixer on low speed. Add butter and mix on low for another 30 seconds, scraping down the sides of the bowl with a spatula until completely blended. Slowly. combine in dry ingredients and blend, but do not overmix. Add white chocolate and lightly fold in. Save some chocolate bits to put on top after baking, in case the baked chocolate gets a little colored when baking.

Scoop dough into rounded tablespoons and place on cookie sheet 2 inches apart. Sprinkle cookies with sea salt.

Bake for 12 minutes. Remove from oven and add extra white chocolate on top if needed.

Enjoy with a tall glass of milk!

Christmas Tree Rice Krispies | Dye Free | Vegan

Christmas Tree Rice Krispies

Super cute and super easy!

INGREDIENTS

3 tbsp butter / vegan butter
2 cups marshmallows of choice (homemade, or a healthier dye free brand )
2 ½ cups organic brown rice crisp cereal
1 Color Kitchen Green Packet
Justin’s mini peanut butter cups
Yum Earth dye free chocolate gems

DIRECTIONS

Combine butter & marshmallows on stove top until melted.
Add in green color powder.
Then add in cereal and combine until all are coated.
Wet hands then roll chunks of the mixture into a tree / cone shape.
Use a bit of white icing to secure your pb cup to the bottom as the tree stand.
Pipe icing as strings across the trees, then place chocolate gems as your tree lights.
Enjoy!

~ Follow @colleenshealthylife for more fun and festive recipes!

Winter Hanukkah Cookies-Icing | Artificial Dye-free | Natural | Vegan Friendly

Mix, dip, sprinkle and drizzle to make colorful cookies for the winter holidays.! Our kit includes all the ingredients for easy to make natural icing with organic ingredients.

MAKES: DOZENS OF COOKIES

Winter Hanukkah Cookies-Icing

INGREDIENTS

milk (or substitute)
vanilla
coconut oil (optional)
3 piping bags or plastic baggies (optional)
Color Kitchen Winter Icing Set

DIRECTIONS

Put powdered sugar in medium sized mixing bowl and add 3 tbsp milk and ½ tsp vanilla. Stir with spoon or hand mixer on low. Add 1-2 more tsp milk depending on desired thickness. Mix until smooth.Pour ⅓ cup icing (each) into 2 small bowls. Set aside remaining icing for white.

blue and green icing

Open color packets and add ½ tsp of color to each icing bowl and stir. Add more color to get deeper shades. Stir until all the powder color is dissolved. Keep unused color airtight in packets. If icing is still too thick, add ½ tsp milk at a time and stir until desired consistency is reached. Add ½ tsp melted coconut oil for sheen (optional).

Dip cookies in icing, or drizzle with a spoon. Or, pour icing into piping or plastic bags and cut a small hole at the tip.

Decorate and enjoy!

Winter Hanukkah Cookies-Icing

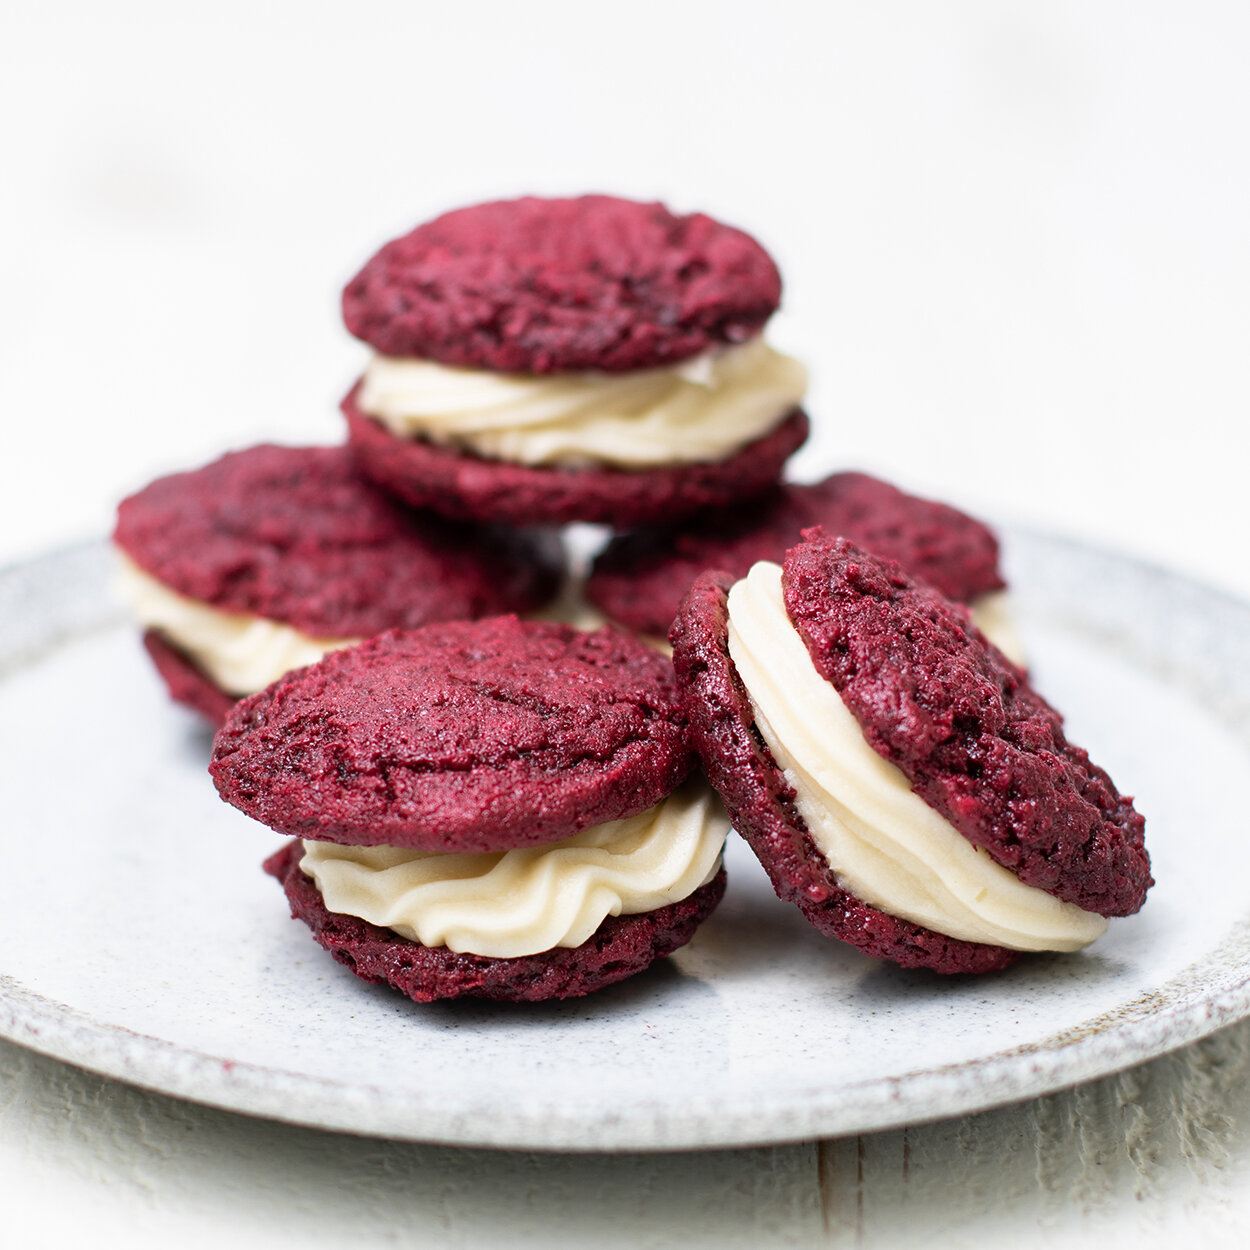
Red Velvet Whoopie Pies with Cream Cheese Filling | Gluten-free | Natural

Red Velvet Whoopie Pies

Red Velvet Whoopie Pies are fun for any season, especially around the holidays or as a Valentine's treat. This recipe makes it simple with artificial dye-free, plant-based red color.  

MAKES: 12

INGREDIENTS-COOKIES

2 cups 1:1 Bob's Red Mill gluten-free flour
1 tsp baking powder
4 tbsp non-alkalized cocoa powder
1 Color Kitchen Red Velvet Color Packet
¾ cup natural sugar
¼ cup brown sugar
½ cup butter, melted
1 egg
1 tsp vanilla extract
½ cup buttermilk or kefir
½ tsp salt

INGREDIENTS-CREAM CHEESE ICING (FILLING)

1 Color Kitchen Plain Frosting Mix
1 stick butter (room temp)
8 oz cream cheese (room temp)
1 tsp vanilla
a pinch of salt


DIRECTIONS-COOKIES

Preheat oven to 325°F.

Using a hand mixer, cream together softened butter and sugars.

Add in the egg, vanilla extract, and buttermilk. Beat on medium/high speed.

In a separate bowl combine the dry ingredients: flour blend, baking powder, cocoa powder, natural red velvet color, and salt.

Slowly add dry ingredients to wet and blend gently, but do not overmix.

Chill the cookie dough for at least an hour before baking or cookies may bake flat.

Bake cookies for 10-13 minutes. Cool on cookie rack before frosting.

DIRECTIONS-ICING (FILLING)

Put cream cheese and butter in mixing bowl and beat until creamy. Add vanilla and salt and blend. On low, slowly add powdered sugar and mix for 1 min, or until completely blended.

Put a scoop of filling between 2 cookies to make pies. Enjoy!


Holiday Sugar Cookie with Naturally Colored Icing | Dye-free

Holiday Sugar Cookie

Yummy! Festive! Decorative! Easy! These holiday cookies check all the boxes. Get your kids involved for some extra fun!

MAKES: 18-20 COOKIES

INGREDIENTS

2 ¾ cups all-purpose flour
½ tsp baking powder
¼ tsp kosher salt
⅔ cup granulated sugar
¾ cup (1 ½ sticks) unsalted butter, at room temp
1 large egg
½ tsp pure vanilla extract
Color Kitchen Holiday Icing Set

DIRECTIONS

Line two large cookie sheets with parchment paper. In a large bowl, whisk together the flour, baking powder and salt. Using an electric mixer, in a large bowl, beat the butter and sugar until light and fluffy 2 to 3 minutes. 

Add egg and vanilla.

Reduce mixer speed to low and add flour mixture, mixing until just incorporated. 

Shape the dough into a disk then roll between 2 sheets of parchment paper until ¼-inch thick. Cut out shapes (such as circles, stars and triangles) and use a small offset spatula to transfer to prepared cookie sheets. Reroll scraps and cut out. Chill until firm, at least 20 minutes.

Meanwhile, preheat the oven to 350°F. Bake, rotating the pans halfway through, until the cookies are lightly golden brown around the edges, 13 to 15 minutes. Let cool on baking sheets.

Sugar Cookies

Once cool, make the icing.

Divide the sugar between 4 bowls shallow (about ½ cup per bowl) and prepare according to package directions. 

Line 2 large baking sheets with parchment paper. Working one at a time, dip one side of each cookie (or one half of each cookie)  in one color of glaze. Gently shake off the excess and transfer to a wire rack. Use a fork to drizzle the cookies back and forth with the other colors. To create patterns, drag a toothpick back and forth through the drizzled lines. Let dry completely. 

~Recipe by Anna Helm Baker

New Year’s Eve Champagne Yogurt Cupcakes with Sparklers | Natural

New Year’s Eve Champagne Yogurt Cupcakes with Sparklers

Champagne Cupcakes made with Greek Yogurt – sparkling with naturally colored frosting and sprinkles for your New Year celebration!

MAKES: 12 CUPCAKES
Prep Time: 35 minutes
Cook Time: 20 minutes

Ingredients 

CUPCAKES
1 ¾ cups all purpose flour
½ tsp baking soda
½ tsp baking powder
½ tsp salt
½ cup unsalted butter, softened
1 cup granulated sugar
2 large eggs
1 tsp vanilla
½ cup Greek yogurt, room temperature
½ cup Champagne

FROSTING
Color Kitchen Plain Frosting Mix
Color Kitchen Blue, Pink & Green Color Packets
Color Kitchen Nonpareils
OR Color Kitchen Frosting Mixes with Sprinkles (colors of your choosing)
½ cup butter, softened
1 ½ tbsp milk
1 tsp vanilla

DECORATION
12 small sparklers

Cupcakes

Directions

CUPCAKES
Preheat the oven to 350 degrees and line a cupcake tin with cupcake liners.

In a large bowl, whisk together the flour, baking powder, baking soda, and salt until combined.

In a separate large bowl, cream together the butter and sugar for 2-3 minutes, until light and fluffy.  Add the eggs and vanilla and beat until combined.  Add the sour cream and beat until incorporated.

Add the dry ingredients to the wet ingredients and beat together until you have a thick batter.  Add the champagne to the batter and beat on low speed until all ingredients are combined in a smooth batter.

Scoop the batter into the cupcake liners, filling each liner about ⅔ of the way.  Bake for 20 minutes, and allow to cool before frosting.

FROSTING
In a stand mixer with a paddle attachment, beat together the confectioner’s sugar from the frosting mix and the butter until combined. Add the vanilla and milk and continue to beat until you have a smooth frosting.

Divide the frosting between 4 bowls. In the first bowl, add ¼ or ½ teaspoon of pink color (Note:¼ teaspoon will give you a pastel color, ½ teaspoon will give you a more vibrant color). In the second bowl, add ¼ or ½ teaspoon of blue color. In the third bowl, add ¼ or ½ teaspoon of green color. In the third bowl, add ¼ teaspoon of pink color and ¼ of teaspoon of blue color (this will make purple). Stir the color into the frostings until you have an even color.

Pipe the frosting onto the cupcakes and top with nonpareil sprinkles.Top with small sparklers and light them at midnight for a fun New Year’s Eve celebration!

Christmas Cookie Cake with Rosemary & Cranberries | Artificial Dye-free | Natural Ingredients

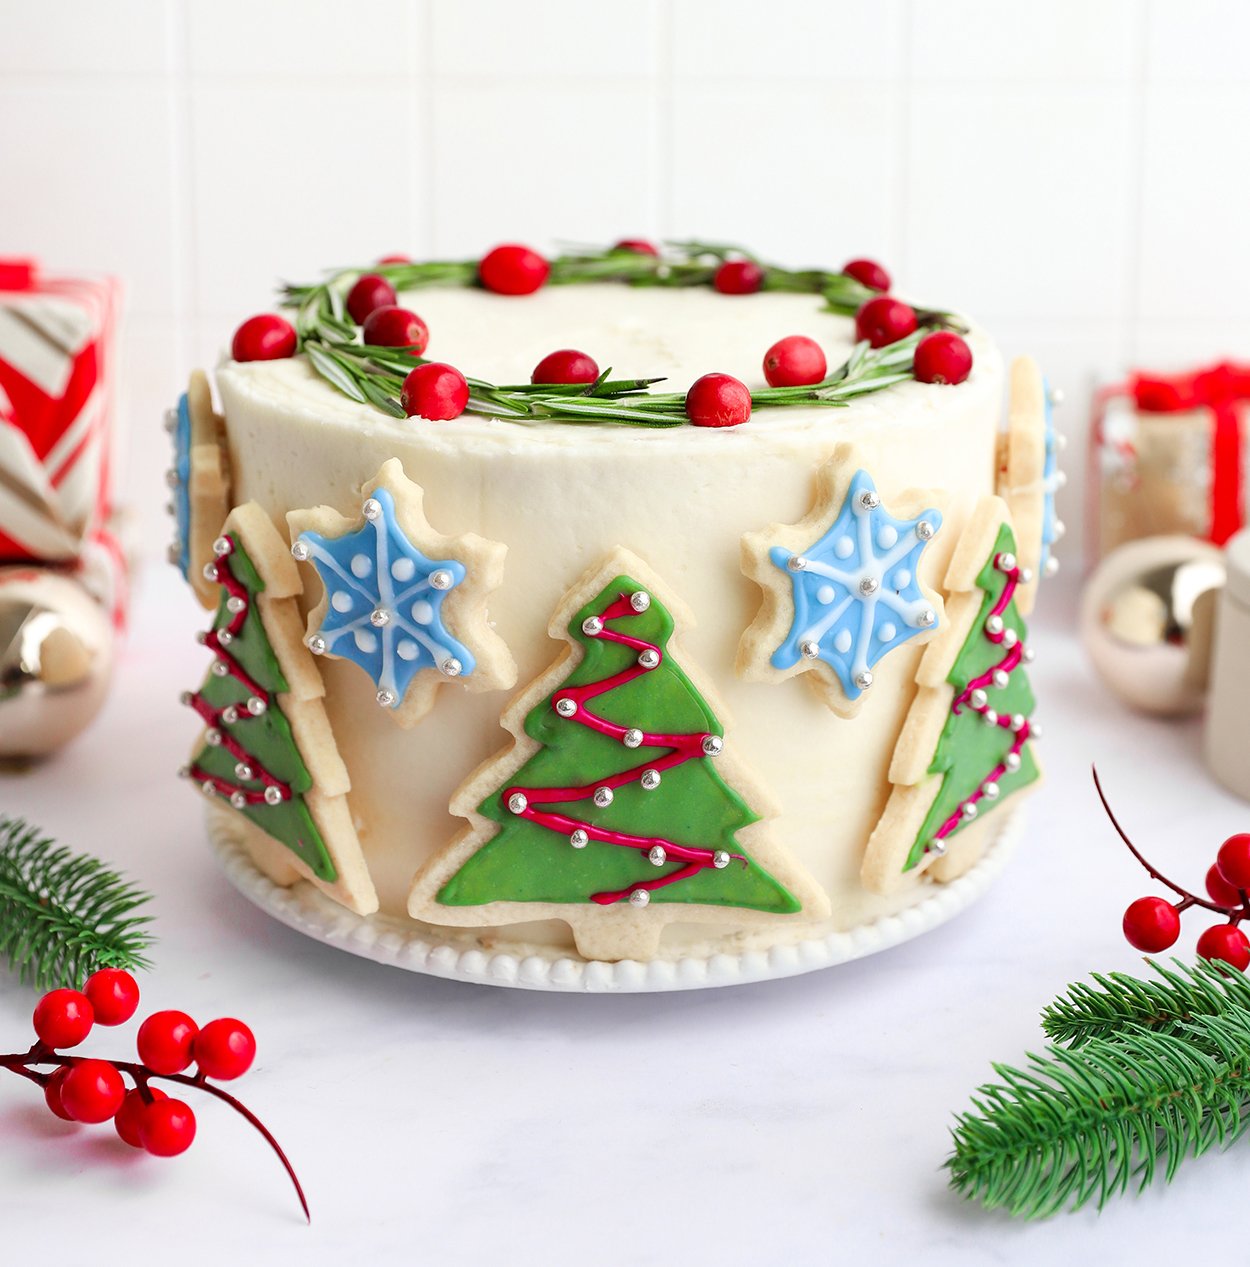
Christmas Cookie Cake with Rosemary & Cranberries

Who needs to decide between cookies & cake, when you can have both! Use your decorated Christmas cookies to embellish this festive holiday cake made from all natural ingredients.

MAKES: 16 SERVINGS
Prep Time: 2 hours
Cook Time: 40 minutes

INGREDIENTS

CAKE
1 ½ cup (3 sticks) unsalted butter, softened
3 ⅓ cup granulated sugar
6 large eggs, at room temperature
2 tsp vanilla extract
2 cups whole milk
5 cups all-purpose flour
4 ½ tsp baking powder
1 tsp salt
2 cups whole milk

BUTTERCREAM FROSTING
2 packs Color Kitchen Plain Frosting Mix
1 cup butter (or substitute)
3 tbsp milk (or substitute)
2 tsp vanilla

COOKIES
½ cup unsalted butter, softened
½ cup granulated sugar
1 tsp vanilla extract
1 large egg, at room temperature
1 ¼ cups all-purpose flour
¼ tsp baking powder
¼ tsp salt

ICING
1 bag Color Kitchen Holiday Icing Mix
3 tbsp milk
½ tsp vanilla
A couple drops coconut oil to prevent cracking (optional)

DIRECTIONS

CAKE LAYERS

Preheat the oven to 350 degrees and grease 4 8-inch round pans.  Note: if you only have 2 8-inch pans, half the recipe and make it in 2 batches.

In a large bowl with a hand mixer, beat together the butter and sugar on medium speed for 3 minutes.  Add the eggs and vanilla to the butter mixture and beat until combined.

In a separate bowl, whisk together the flour, baking powder, and salt.

Add half of the flour mixture to the wet ingredient mixture and beat until combined.  Add the milk and beat again until combined.  Add the remaining flour and beat until you have a smooth batter.

Divide the batter evenly among the 4 pans and bake for 30 minutes, until a toothpick inserted in the center of the cake comes out clean.

Allow the cakes to cool in the pans for 10 minutes, then invert onto a cooling rack.

BUTTERCREAM

In a stand mixer with a beater attachment, beat the butter and vanilla on medium speed until smooth and creamy.

Add the powdered sugar, one cup at a time, beating on low speed between each addition until smooth.

Slowly add the milk and continue to beat on low speed until incorporated.

Christmas Cookie Cake with Rosemary & Cranberries

COOKIES

In a stand mixer with a beater attachment, beat together the butter and sugar on high speed for 3-4 minutes 

Add the eggs and vanilla to the butter mixture and beat on low speed until combined.

Add the flour, salt, and baking powder and beat until all ingredients are combined in a smooth dough.

Form the dough into a disk and wrap with plastic wrap.  Place in the fridge to cool for 1-2 hours.

Preheat the oven to 350 degrees and line a baking sheet with parchment paper.

When the dough is done chilling, roll it out into a ½-inch thick sheet.  Cut out cookie shapes using cookie cutters of your choice.

Place the cookies on the baking sheet and bake for 10 minutes.  Let cool for at least 15 minutes before decorating with icing.

ICING

Prepare the icing according to the instructions on the package.  Optional: add a couple drops of coconut oil to prevent cracking.

Divide the icing between 2-4 bowls, and mix in color packets of your choice.

CAKE ASSEMBLY

Decorate the cookies with the icing as desired and set aside for at least 1 hour to let the icing harden.

Assemble the cake.  Place one cake layer on a plate or cake stand.  Add a layer of frosting on top, then stack the second cake layer on top.  Repeat with all of the cake layers, then frost the outside of the cake.

Place a teaspoon dollop of buttercream on the back of each cookie, then stick the cookies onto the cake.

Optional: decorate the top of the cake with rosemary sprigs and cranberries.

Christmas Tree Sugar Cookies | Natural | Dye-free

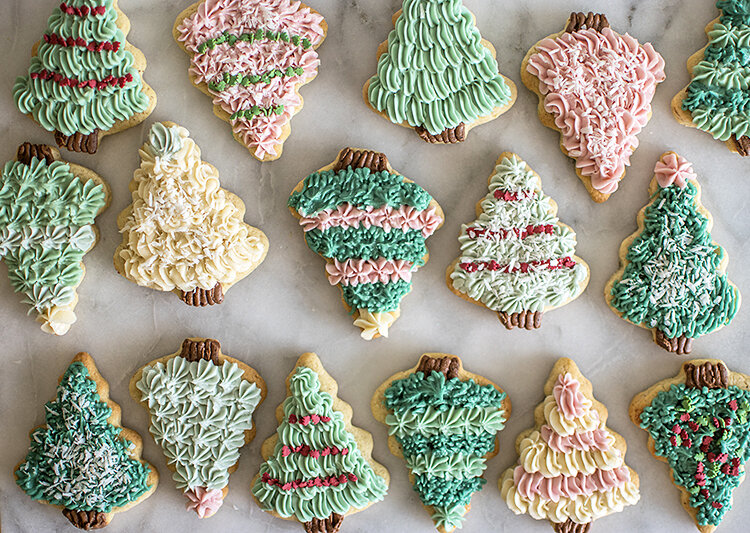
Christmas Tree Sugar Cookies

So precious are these Christmas tree cookies — make a dessert to be remembered by your family and your friends this holiday season!

MAKES: 30 COOKIES

Christmas Tree Sugar Cookies

INGREDIENTS

COOKIES
1 stick (113 g) organic butter, softened
198 g (¾ cup + 2 tbsp) organic sugar
1 tsp organic vanilla extract
2 organic large eggs
255 g (2 cups) organic flour
½ tsp organic cloves
1 ½ tsp baking powder
½ tsp sea salt

ICING
3 sticks (339 g) organic butter, softened
680 g (5 cups) organic powdered sugar, sifted
¼ cup water
4 g (a pinch) organic Dutch cocoa
1 Pink Color Kitchen Color packet
1 Blue Color Kitchen Color packet
1-2 Green Color Kitchen Color packets

EXTRAS
Christmas Tree Cookie Cutter
rolling pin
extra flour for rolling out cookie dough
piping bags
Ateco decorating tips #56, 30, 133, 96, 21, 34
organic fine shredded coconut

DIRECTIONS

Preheat oven to 375 degrees.

In the bowl of your stand mixer fitted with paddle attachment, add the butter, sugar and vanilla extract. Mix on low until all ingredients are combined and there’s no butter chunks.

Add the eggs and mix just slightly.

In a separate bowl, add the flour, cloves, baking powder and salt and whisk together.

Add the flour mixture into the butter mixture and mix until a cookie dough forms.
Flour a surface and roll out the cookie dough to ¼” thick.

Cut out Christmas Trees with a Christmas Tree cookie cutter. Place on a baking sheet with parchment paper, space at least 1” apart.

Bake for 10 minutes. Once cooled, start the frosting.

In the bowl of your stand mixer fitted with paddle attachment, add the butter, powdered sugar and water. Mix on low until combined and then speed up to mixer to high for 1 minute or until light and fluffy.

Split the frosting in six bowls. Put 50 g in one bowl and add the Dutch cocoa, stir to combine into a chocolate frosting.

In two bowls, add 222 g of frosting to each bowl. In one of the bowls add ½ tsp Green and in the other add 2 tsp Green. Stir both to combine completely.

In the last three bowls, add 171 g of frosting in each. In one of the bowls, add just a pinch of Blue and stir to combine completely. In another bowl add just a pinch Pink and stir to combine completely. Colors will be very light and pastel. Add more color for deeper shades.

Put the chocolate frosting in a piping bag with decorating tip #56.

Put the light green frosting in a piping bag with decorating tip #30.

Put the dark green frosting in a piping bag with decorating tip #133.

Put the white frosting in a piping bag with decorating tip #96.

Put the blue frosting in a piping bag with decorating tip #21.

Put the pink frosting in a piping bag with decorating tip #34.

Be creative with designs on each tree. Top with sprinkles or fine shredded coconut to make them look snowy!

Store in an airtight container.

Baker’s Note: To make these gluten free, just substitute the organic flour for 270 g organic gluten free flour blend.

Recipe by Dessert'D Organic Bake Shop

Watercolor Cookies | Natural | Dye-free

Watercolor Cookies
winter watercolor

Create masterpieces on icing or fondant. Paint on cookies and cakes to make personal designs for your next party, holiday gift, baby shower or tea party!

INGREDIENTS

2 Color Kitchen Color packets
paint brush

DIRECTIONS

In small bowls or a paint palette mix powder colors with a couple drops of water and dissolve with brush. Only a small amount of color is needed (¼ tsp powder).

Paint on icing, fondant or frosting like watercolors.

For darker color use 1 to 1 ratio of color to water. For lighter shade use 3 to 1 ratio of color to water.

Mix colors for a range of hues.


Red Icing | Natural | Dye-free

natural_red_color_icing_cookies_blog.jpg

From magenta to fire engine red, here are three icing recipes to create gorgeous shades.

Natural Color Red Icing

FIRE ENGINE RED (left)
3 cups powdered sugar
5 tbsp milk
2 tbsp Red Velvet Color Kitchen Color
Orange Color Kitchen Color Packet (approx ½ packet or 1 tsp)

MAGENTA (middle)
3 cups powdered sugar
5 tbsp milk
3 tbsp Color Kitchen Red Velvet Color (1 full packet)

BRIGHT RED (right)
3 cups powdered sugar
5 tbsp milk
2 tbsp Red Velvet Color Kitchen Color
1 Yellow Color Kitchen Color Packet (approx 1 ½ tsp)

Grinch Hot Cocoa | Natural | Dye-free

Grinch Hot Cocoa

Even the Grinch will start to like Christmas with this delicious drink!

MAKES: 4 CUPS

INGREDIENTS

4 cups organic milk
2 tbsp + 2 tsp (30 g.) organic sugar
2 tbsp (30 g.) organic white chocolate (for melting) chunks
1 Green Color Kitchen Color Packet
Whipped cream or marshmallows (optional)

DIRECTIONS

In a medium pot, add the milk, sugar, white chocolate and green dye.

Put over high heat and stir until temperature on a drink thermometer reaches 140-160 degrees.

Remove from heat and pour into mugs.

Top with marshmallows, whipped cream and sprinkles!

Candy Cane Mousse | Natural

Candy Cane Mousse

This unique and easy to make sweet treat will have your family and friends asking for more!

MAKES: 4 JARS

INGREDIENTS

1 ½ cups organic heavy whipping cream
16 g (1 tsp) organic sugar
1 tsp organic vanilla extract
250 g (1 ⅓ cup) organic white chocolate, chopped
1 tsp organic peppermint flavor
1 Pink and 1 Yellow Color Kitchen Color packets, or 2 tsp Color Kitchen Red Velvet Color
organic candy canes, crushed

EXTRAS

3 piping bags
decorating tip #846

Candy Cane Mousse Recipe by ColorKitchen

DIRECTIONS

In a double boiler, melt the white chocolate. Once completely melted, slowly add ¼ cup of the cream and stir to combine completely.

Remove from heat place in the fridge until completely cool, about 2 hours.

Divide the ganache into two separate bowls, they should weigh about 85 g each.

In one of the bowls, add the yellow dye, pink dye and peppermint flavor and stir to combine completely.

In a stand mixer fitted with whisk attachment (or you can use a hand mixer), add the remaining cream, sugar and vanilla extract. Whisk on low and gradually turn up the speed as soon as it doesn’t splatter anymore. Turn the speed up to high and whisk until the whipped cream has formed a stiff peak.

Divide the whipped cream into the two bowls of ganache, you will have about 57 g in each bowl. Fold in the whipped cream until completely combined.

Cover with plastic wrap and put back in the fridge for at least 4 hours or overnight.

Put both the white chocolate and pink peppermint mousse in a piping bag and cut a small hole in each.

Then place them both in another piping bag with decorating tip #846.

Pipe into shallow bowls or shot glasses and serve immediately.

Top with crushed candy canes.


Recipe by Dessert'D Organic Bake Shop

Bundt Cake Glaze | Dye-free

Bundt Cake Glaze

You can’t have a bundt cake without glaze. Make it pop with any plant-based color. Enough said!

MAKES: GLAZE FOR 1 BUNDT CAKE

INGREDIENTS

2 cups powdered sugar
⅓ cup butter
1 ½ tsp vanilla
2 tbsp water
1 Color Kitchen Color packet

DIRECTIONS

Melt butter in a saucepan.

In separate bowl blend powdered sugar and color.

Stir in with melted butter and add water slowly. Mix until blended smooth.

Pour over and cover cake. Let cool before enjoying.

Italian Cream Cake | Gluten-free | Dairy-free

Snowflake Cake

INGREDIENTS

CAKE
½ cup organic palm shortening
½ cup non-dairy, cultured coconut oil butter 
2 cups organic unbleached cane sugar 
3 eggs, at room temperature
3 eggs divided into yolks and whites
2 tbsp agave nectar 
1 ¼ cup almond or coconut milk blend
2 tsp vanilla extract
½ tsp almond extract
3 cups finely ground almond flour
1 cup Edward & Sons coconut flour
1 tbsp baking powder
½ tsp sea salt
1 cup chopped, toasted pecans
½ cup Edward & Sons lightly sweetened shredded coconut    

OPTION 1 (advanced)

FLAX MERINGUE BUTTERCREAM
½ cup flax egg whites (see below)*
1 cup organic unbleached sugar
½-1 cup organic powdered sugar (to taste)
2 tsp vanilla extract
1 tbsp agave nectar (optional)
1 cup organic palm shortening 
½ cup cultured, coconut oil butter 
2 tbsp of non-dairy cultured, cream cheese (optional) 
1 Blue Color Kitchen Color Packet
½ cup Edward & Sons shredded sweetened coconut (for the garnish) 

*REDUCED FLAX EGG WHITES RECIPE
4 cups of water
1½ cup of whole flax seeds (not ground)
INSTRUCTIONS: In a quart saucepan, simmer the flax seeds until reduced to 1 cup of water. Strain seeds and keep in the fridge up to 10 days or keep in the freezer! 
OPTION 2 (easy)

COCONUT CREAM FROSTING
3 cans of Edward and Sons coconut cream chilled overnight
1 packet of gelatin 
1 Blue Color Kitchen Color Packet
1 tsp vanilla 
1-2 cups of powdered sugar

DIRECTIONS

Preheat oven to 350 degrees F. Grease 4, 6” pans (OR) two 9 inch round pans and line the bottom with parchment paper.

Toast pecans while preparing ingredients, approximately 8-10 minutes. (This step will bring out the flavor of the pecans and keep them from being so soggy in the cake. It’s so worth it!) 

In a large bowl, cream the palm shortening and butter, sugar, 3 eggs, 3 egg yolks,  vanilla and almond extract together until creamy

In a large separate bowl, sift the almond flour, coconut flour, baking powder and salt together.

In a clean bowl, (wipe any traces of grease clean with lemon juice or vinegar) whip together the 3 remaining egg whites until stiff peaks form. 

Add the dry ingredients to the wet ingredients, pour in the milk and fold the batter gently by hand until combined.  Then fold in the egg whites, toasted pecans and coconut until combined. Do not over mix!

Divide batter evenly between pans and spread out with a spatula to smooth the tops. Bake for 35-40 minutes or until cake is golden brown, no longer jiggly in the middle and a tester comes out clean.

Let the cake cool before removing from the pan and refrigerate the cake before frosting.

DAIRY-FREE, FLAX SWISS MERINGUE BUTTERCREAM
While the cake is baking, heat together flax egg white and sugar in a small saucepan until sugar has dissolved and add the agave nectar to keep it from crystallizing. Cool this syrup until you are ready to frost the cake. (I usually prep this ahead of time and store in the fridge, then warm it up to room temperature when needed.)   Note: it is very important the syrup is not warm or cold to the touch, or it will not incorporate into the butter correctly and may create a curdled mess of fat and syrup. If this happens just leave it out longer to warm up or place the bowl in warm water for a few minutes to speed up the process. All of your ingredients must be room temperature!

In mixing bowl, beat the organic palm shortening, butter, cream cheese and vanilla until creamy and smooth and slowly add the flax syrup. Continue beating for several minutes until mixture is fluffy and smooth. Add a the powdered sugar and continue to whip for a few more minutes until you reach the consistency of whipped cream. If the mixture doesn’t come together but looks too soft, add a little more butter or shortening by the tablespoon until it fluffs back up to firm peaks. 

Dissolve the powdered food colors in the flax syrup or in the vanilla extract before adding to the “buttercream”

Fill and frost your cake! 

Garnish with coconut and serve! (I pulsed the coconut in the processor a few times until it resembled snowflakes) 

Cake should be kept covered in the fridge for optimal freshness and will stay good for 4-5 days

COCONUT WHIPPED CREAM FROSTING
In a microwave-safe, glass bowl (or saucepan on a stove top) dissolve gelatin in one can coconut cream for 2 minutes over medium heat. 

Let cool before adding the packet of color and vanilla.

Whip together chilled coconut cream and slowly add the cooled gelatin mixture and powdered sugar, whipping until stiff peaks form. This may take 3-4 minutes. If the cream doesn't whip up firm enough,  Let the mixture set in the fridge for an hour if needed and then whip again.  You can leave out the gelatin step 1-2, but this will stabilize the whipped cream and keep it from going flat so quickly when you spread it over the cake.

 Fill and frost on a chilled cake and serve!

Italian Cream Cake

Snowball Coconut Creme Vegan Truffles

Snowball Coconut Creme Vegan Truffles

This vegan dessert is great for the winter holidays, but can also be made with any color throughout the year for a healthy treat.

MAKES: 16-24 truffles

Ingredients

1 cup coconut cream concentrate, also known as coconut butter
¾ cup virgin coconut oil (soft, but not melted)
½  cup coconut milk
½  cup shredded coconut
2 tbsp organic sugar (optional, or substitute with organic, natural sweetener of choice)
½  tsp Blue Color Kitchen Color Packet
1 tbsp vanilla extract
⅛ tsp salt
extra shredded coconut for topping

Directions

Using a mixer or food processor, combine the coconut cream concentrate (coconut butter) and coconut oil until smooth.

In a small bowl, mix blue food color powder with ½ tsp water and stir until all the color is dissolved. 

While the mixer is running, add in coconut milk, ½ cup shredded coconut, sugar, liquid color mixture, vanilla and salt and fully blend.

If the mixture is too soft to manipulate, place in the refrigerator for 30-60 minutes.

Take out when the batter is firm, but not too stiff to be molded.

Once the batter is ready, use an ice cream scoop and roll balls smooth in your hands.

Place each ball in a bowl of remaining shredded coconut to coat.

Keep chilled and thaw at room temperature for 30 minutes before serving.

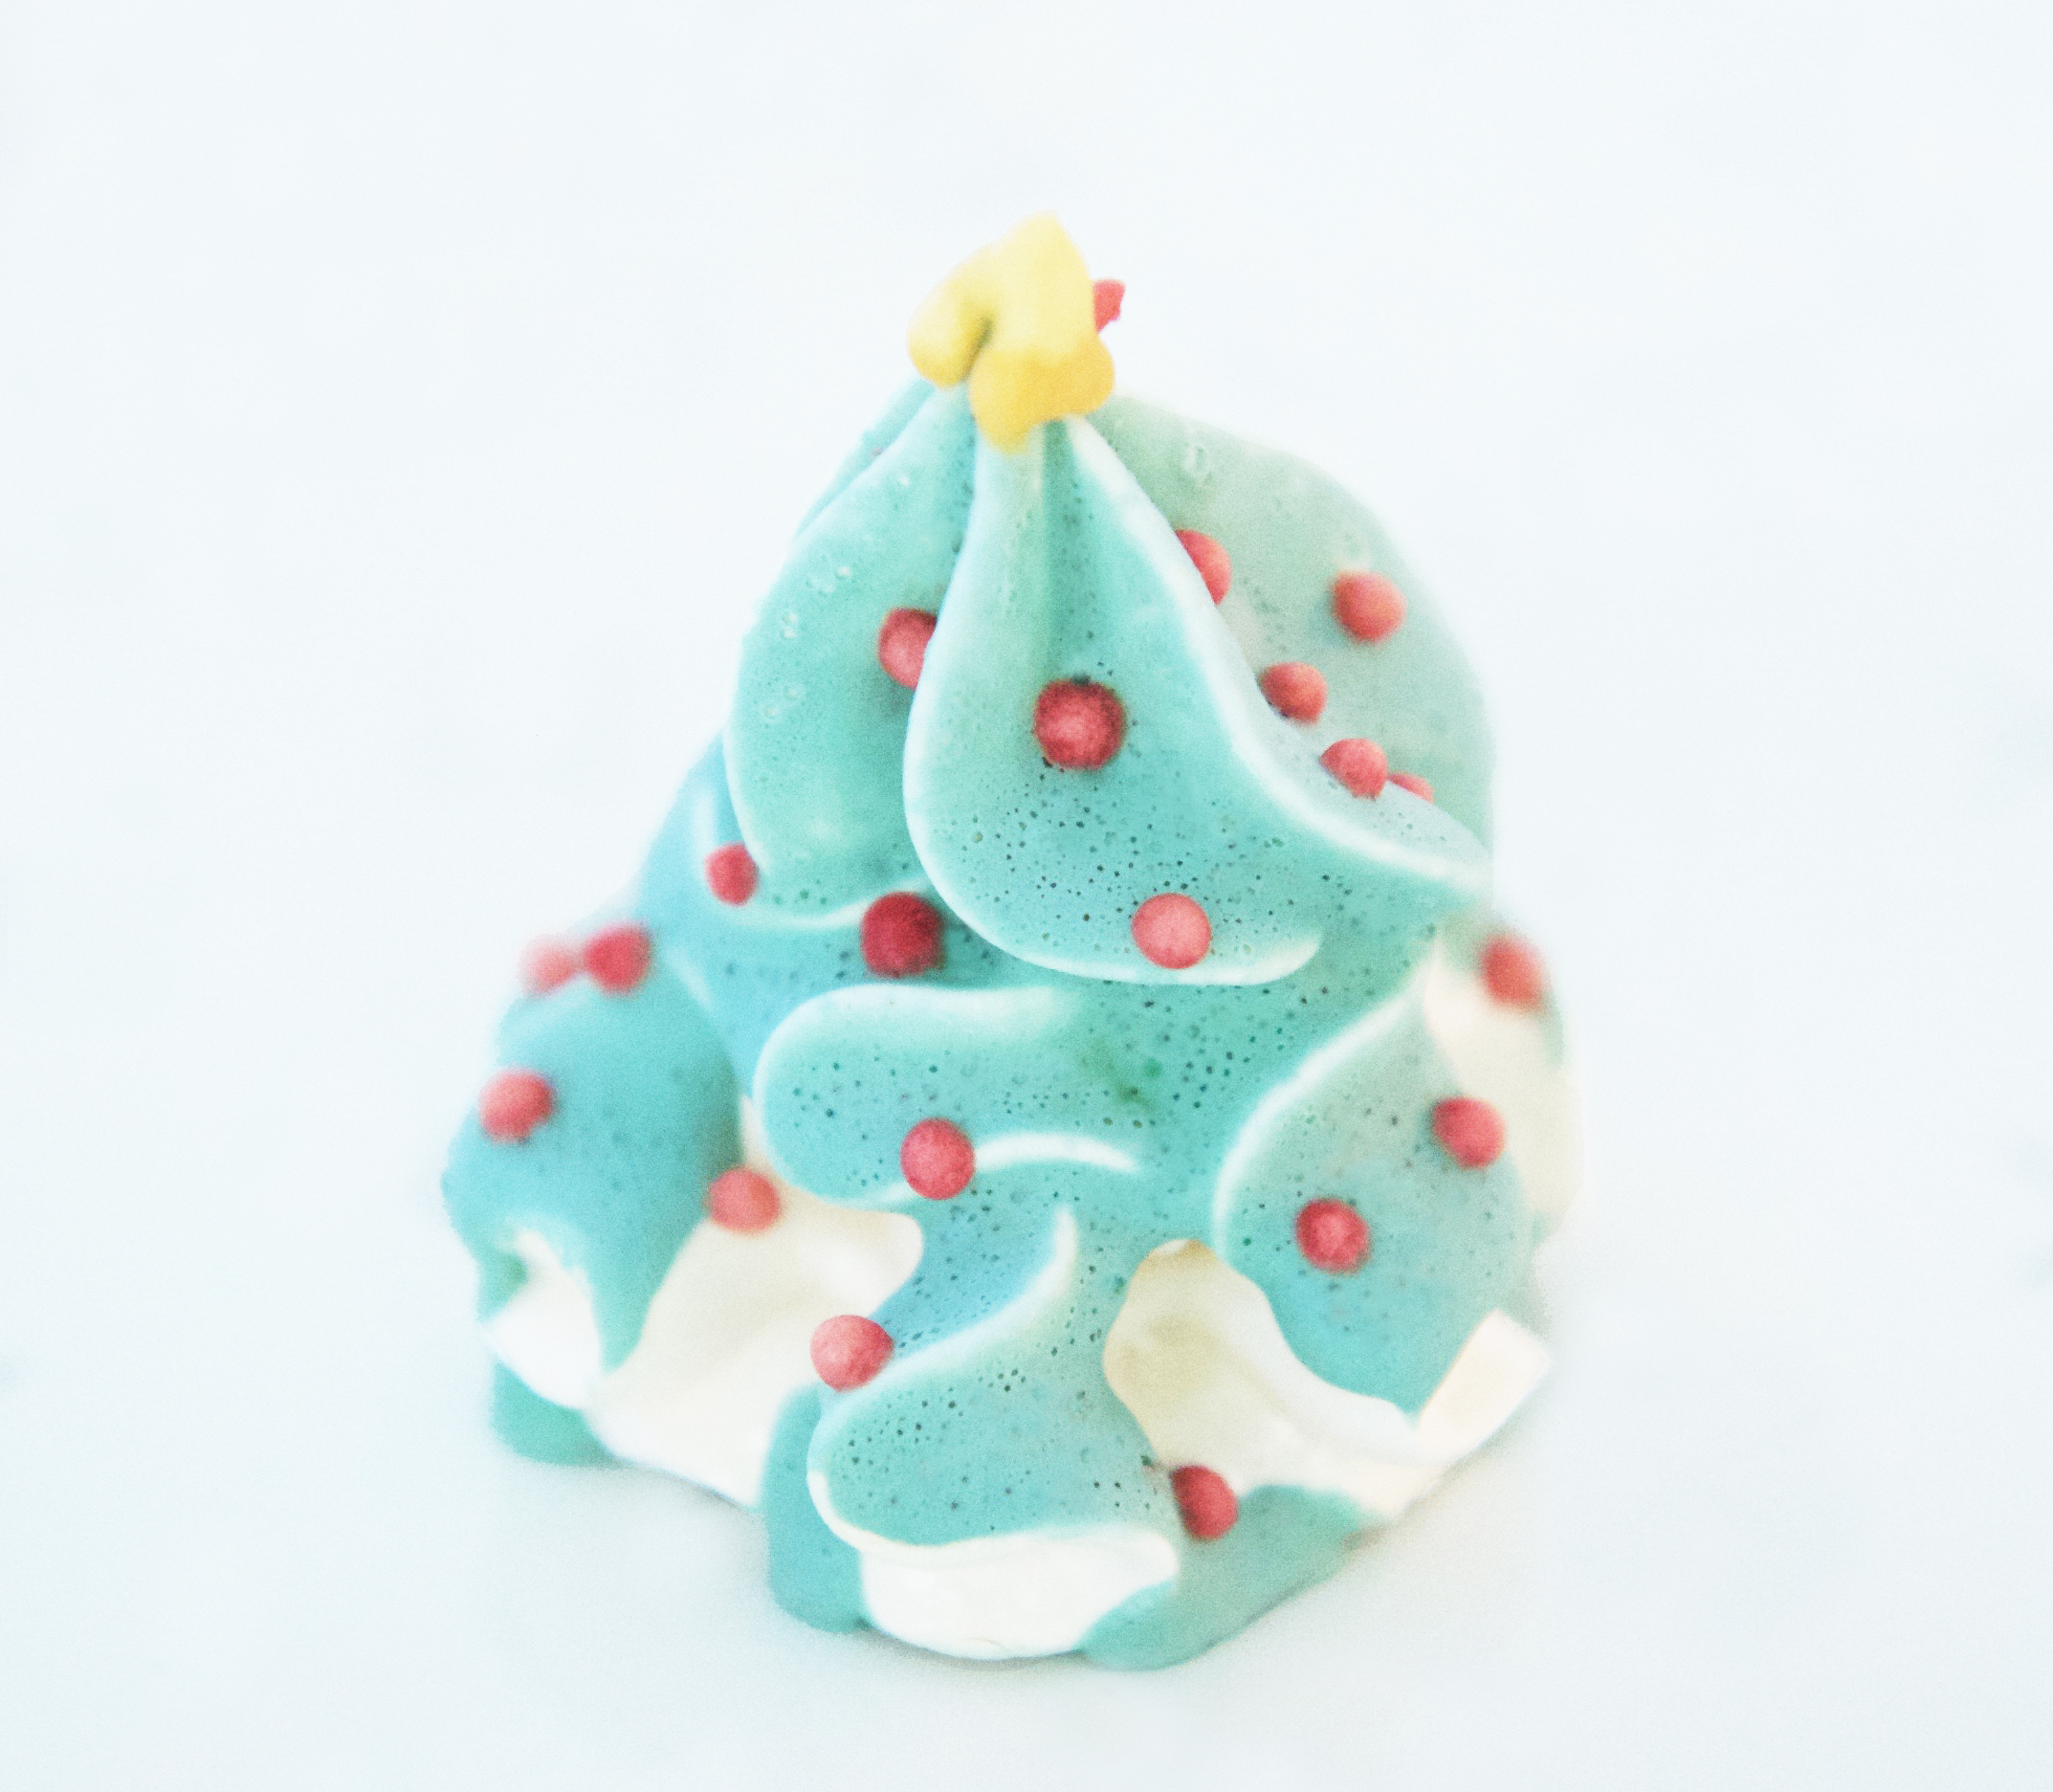
Glazed Christmas Tree Meringues | Natural | Artificial Dye-free

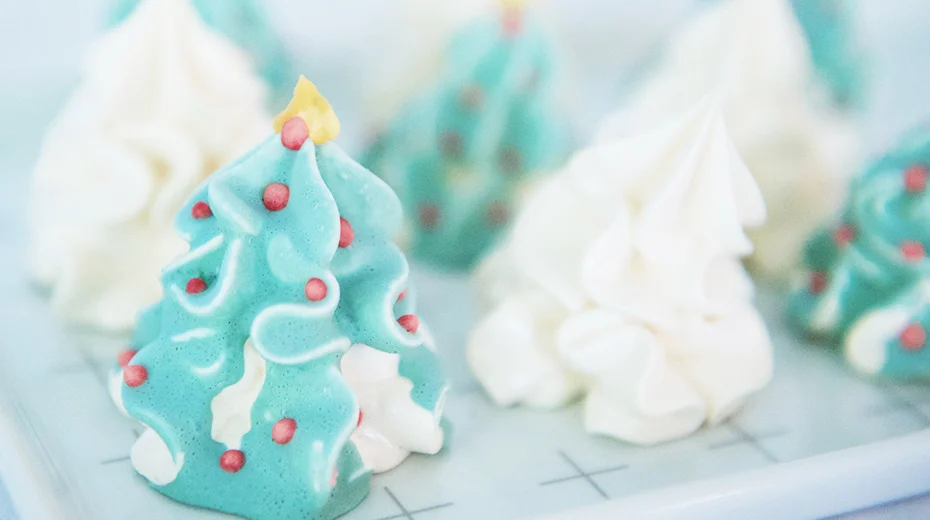
Christmas Tree Meringues

Ingredients

MERINGUES
6 large egg whites, room temperature
1 ½ cups granulated sugar
2 tsp cornstarch
1 tsp distilled white vinegar

Directions

Preheat oven to 300 degrees with racks in upper and lower thirds. Line 2 large rimmed baking sheets with parchment.

Place the egg whites and granulated sugar in a mixer bowl set over a pot of simmering water and heat, whisking occasionally, until sugar is dissolved and mixture is hot, about 3 minutes.

Transfer bowl to mixer fitted with the whisk attachment. Beat on high speed until stiff dry peaks form and bottom of bowl is cool to the touch, 3 to 5 minutes. Fold in the cornstarch and vinegar. Transfer meringue to a large pastry bag fitted with a large open star tip (such as Ateco #829).

Pipe small dots of combined meringue in corners of prepared baking sheets to secure parchment. Holding pastry bag at a 90-degree angle about ½ inch above parchment, pipe base layer of each tree, about 2 inches in diameter, in a swirling fashion. Pipe a smaller layer on top, followed by an even smaller top layer.

Transfer baking sheets to oven and reduce heat to 200 degrees. Bake until meringues feel firm but are still pliable and are not taking on any color, about 2 hours. Let cool completely on baking sheets on wire racks. Trees can be stored in a single layer (without touching) in an airtight container up to 1 week.

Glazed Christmas Tree Meringues

Ingredients

GLAZE
3 large egg whites
4 cups powdered sugar
½ tsp cream of tartar
Green, Red and Yellow Color Kitchen Color Packets
Glycerin or water for mixing colors     

Directions

Using a wooden spoon or rubber spatula, stir egg whites, powdered sugar, and cream of tartar in a medium bowl until a thick paste forms with no dry spots. Ideally, glaze should sit at least 12 hours for sugar to fully hydrate, but it can be used as soon as meringues have cooled.

Or, you can cover and chill up to 1 week. Bring to room temperature before using.

Separate the glaze into 3 bowls. One large bowl for the green and 2 tiny bowls for the red and yellow. In separate bowls mix Color Kitchen powders with glycerin or water to form a smooth paste. Starting slowly add a little color to the glaze. Continue adding color until you like the colors of the glazes. Cover your bowls of colored glaze well with plastic to avoid them drying out until you are ready to start decorating.

The red and yellow glaze should be fairly stiff for piping the star and the tiny red dots. The green however needs to be very runny for dipping the trees. Before you start adding green Color Kitchen paste, add some additional egg white to the bowl and whisk gently till you like the consistency.

Set a sheet of parchment paper on a baking sheet for drying your trees. Holding the bottom of the tree dip the tree in your green glaze. Roll it around to get the sides if your bowl is not very deep. Lift up the tree and let the excess glaze drip off into the bowl. Then gently set your tree on your baking sheet to dry. Repeat with remaining trees.

Once your trees are dry to the touch, you can pipe on the star top and the red dots for decorations. Use either a tiny round pastry tip or a piece of parchment rolled into a cone and snipped at the tip.

Once your trees are finished let them dry over night before storing them in a single layer in an airtight container for a week.

- Recipe by chef Rose Archer


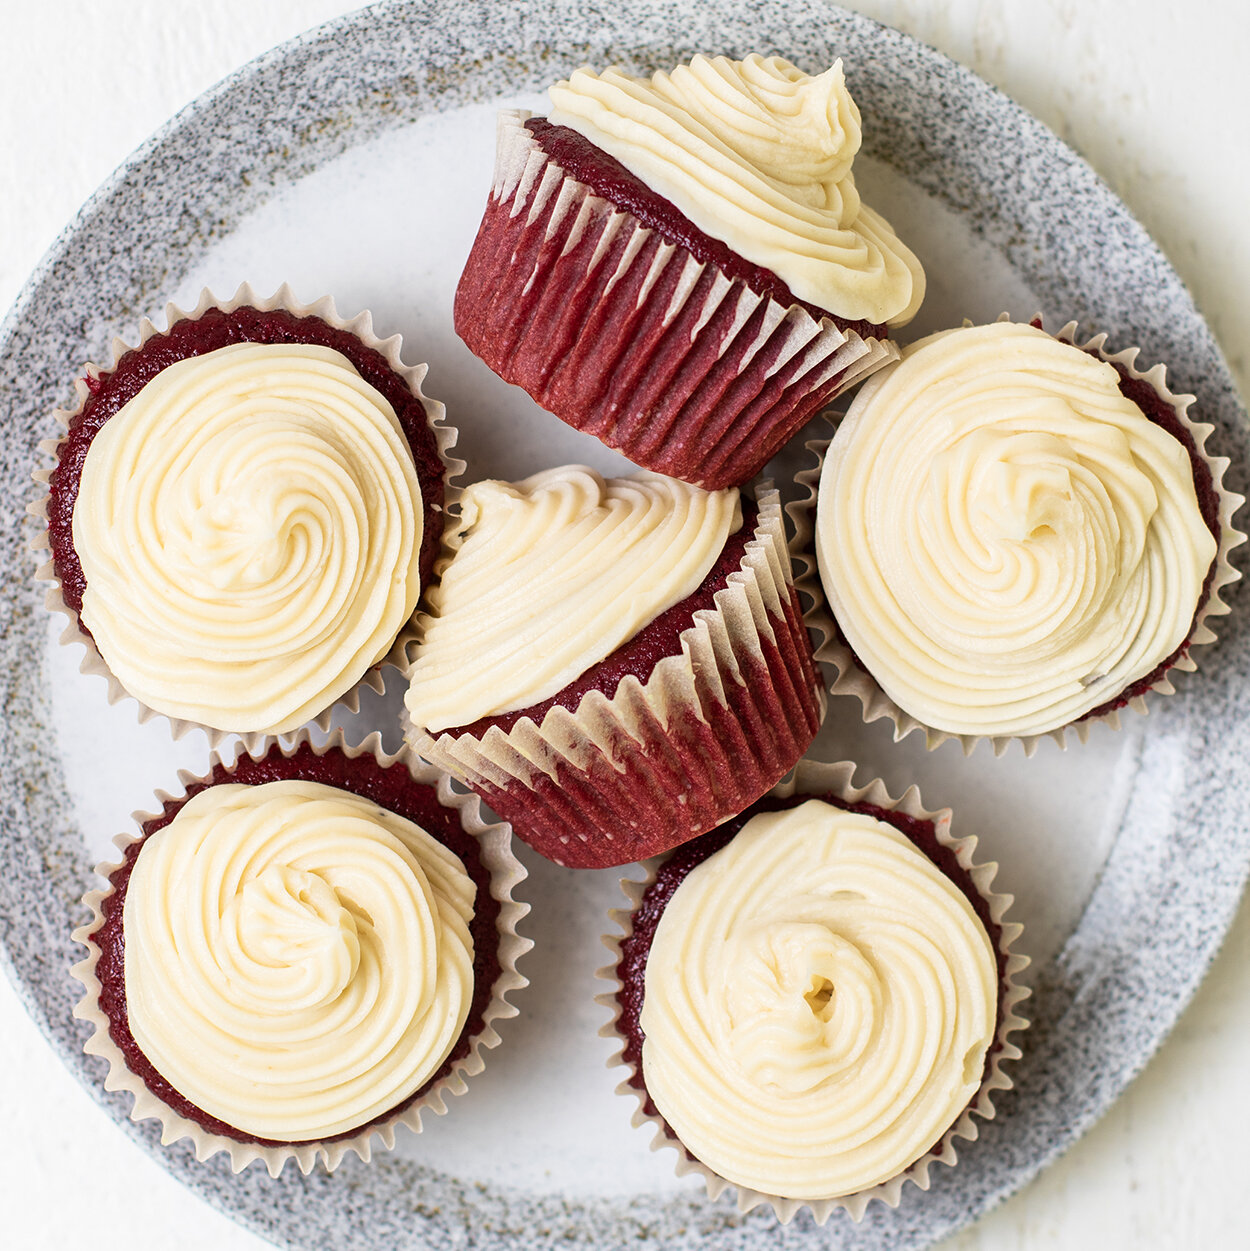
Red Velvet Cupcakes with Cream Cheese Frosting | Natural

Gluten-free Red Velvet Cupcakes

This recipe makes natural, red velvet cupcakes colored with artificial dye-free, plant-based red color. Add a little cream cheese to our Plain Frosting Mix with a few other basic ingredients and you’ve got your cupcakes served!

MAKES: 18

INGREDIENTS-CUPCAKES

½ cup butter (room temp)
1 ½ cup organic sugar
2 eggs
1 tsp vanilla
2 tbsp non-alkalized cocoa powder
2-3 tbsp ColorKitchen Red Velvet color (11-13 grams)
1 tsp salt
1 tsp baking powder
2 ½ cups flour
1 cup buttermilk
1 tbsp vinegar

INGREDIENTS-CREAM CHEESE FROSTING

1 Color Kitchen Plain Frosting Mix
1 stick butter (room temp)
8 oz cream cheese (room temp)
1 tsp vanilla
a pinch of salt


DIRECTIONS-CUPCAKES

Preheat oven to 325°F. Line 18 cupcake tins.

Mix butter, sugar, eggs and vanilla.

In a separate bowl mix dry ingredients: flour, red velvet powder color, cocoa powder, baking powder and salt.

Add vinegar to buttermilk.

Slowly add dry blend into butter mixture along with buttermilk/vinegar.

Fill each tin with batter ½ inch from top of liner. Bake for 15-20 min. Cool well before frosting with cream cheese frosting.

DIRECTIONS-FROSTING

Put cream cheese and butter in mixing bowl and beat until creamy. Add vanilla and salt and blend. On low, slowly add powdered sugar and mix for 1 min, or until completely blended.

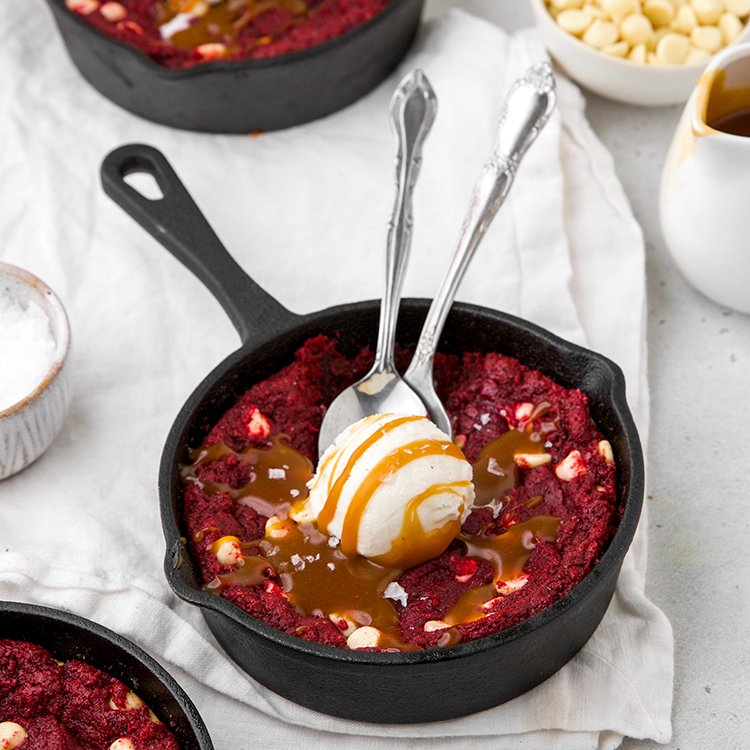
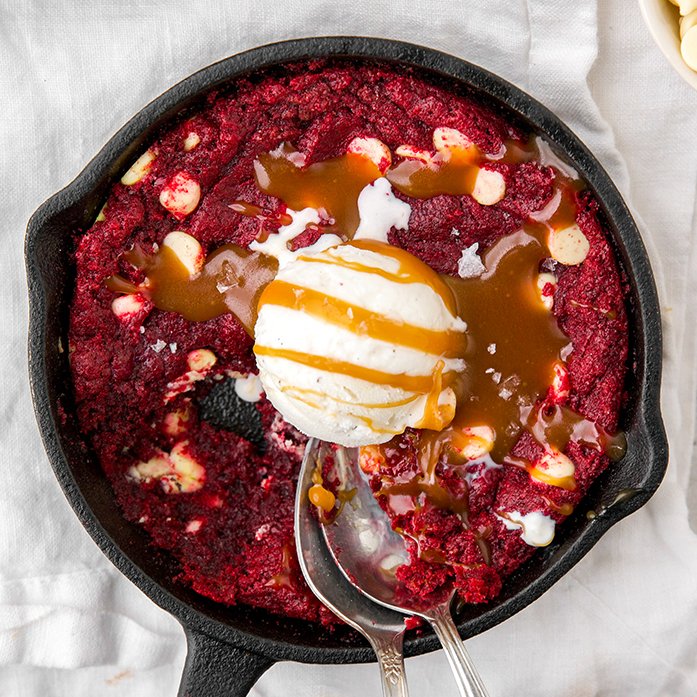
Red Velvet Skillet Cookie Sundaes - Artificial Dye-free | Gluten-free

Red Velvet Skillet Cookie Sundaes

Baked in cast iron skillets, these gluten-free red velvet cookie pies are served warm, melting with white chocolate, caramel, and ice cream yumminess. A perfect holiday dessert for those cold nights, to be shared with those you love.

MAKES: 3 COOKIE PIES
Prep Time: 10 minutes
Cook Time: 30 minutes

INGREDIENTS

COOKIES
1 bag Color Kitchen Red Velvet Cookie Mix
1 egg (room temp)
1 tbsp buttermilk (or yogurt)
1 stick butter (softened), plus some for greasing the skillets
1 tsp vanilla
½ cup white chocolate chips

CARAMEL SAUCE
1 cup granulated sugar
1 stick butter
½ cup heavy whipping cream

TOP WITH
3 scoops vanilla ice cream

Red Velvet Skillet Cookie Sundaes

DIRECTIONS

Preheat the oven to 325 degrees and grease 3 mini cast iron skillets with butter.

Prepare the red velvet cookie dough according to the instructions on the package (vegan option available).  Fold in the white chocolate chips.

Divide the cookie dough evenly between the 3 skillets and press it into the bottom of the skillets.  Place the skillets in the refrigerator to chill for 15 minutes.

When the dough is done chilling, transfer the skillets to the oven and bake for 16 minutes.

While the skillet cookies are baking, prepare the caramel sauce. Heat sugar in a small skillet over medium heat, stirring constantly until it is totally melted.  The sugar will form clumps before beginning to melt.  Once the sugar melts, add the butter and stir until it is melted.  The mixture will sizzle up when the butter is added.  Don’t be alarmed, this is normal.  When the butter is melted, add the heavy cream (the mixture will sizzle up again) and stir until all of the ingredients are evenly combined.  Let the caramel simmer for 2 minutes, then remove from heat and let cool.

When the cookies are finished baking, let them cool for at least 10 minutes.

Once the cookies are finished cooling, top each one with a scoop of vanilla ice cream and drizzle with caramel sauce.