Unicorn Cake

All natural colored Unicorn Cake

This is a little girl’s absolute dream come true, and we’re here to make it easier for you! Let’s have fun!

MAKES 3 Layer 6” Cake

Cake:
1 stick (113 g.) organic butter, softened
170 g. organic sugar
1 tsp. organic vanilla extract
2 organic large eggs
½ cup organic milk
170 g. all natural cake flour
½ tsp. baking powder
½ tsp. sea salt
Pink Color Kitchen Color packet
Color Kitchen Rainbow Sprinkles

Cake Frosting:
1 ½ sticks organic butter
340 g. organic powdered sugar, sifted
1 tsp. organic vanilla extract
1-2 tsp. water

Decorating Frosting:
1 ½ sticks organic butter
340 g. organic powdered sugar, sifted
1 tsp. organic vanilla extract
1-2 tsp. water
Pink, Green and Blue Color Kitchen Color packets

Unicorn Horn & Ears:
1 organic ice cream cone (such as Three Twins, find here)
57 g. (2 oz.) organic white chocolate, chopped
all natural white sprinkles
1 organic graham cracker (such as Annie’s Organic Honey Grahams, find here)

directions:

Preheat oven to 350 degrees.

In the bowl of your stand mixer fitted with paddle attachment, add the butter, sugar and vanilla extract. Mix on low until combined and you have no butter chunks.

Add the eggs and mix just slightly.

In a separate bowl, add the cake flour, baking powder and sea salt and whisk together.

UnicornCakeSlice_0003.jpg

Add the milk and the cake flour mixture into the mixing bowl and mix on low until you have a smooth cake batter. Scrape the sides of the bowl and mix again if needed so there are no chunks.

Separate the cake batter into three bowls, they should weigh about 218 g. each. In one bowl, add ¼ tsp. ColorKitchen Pink Dye, in the second add ½ tsp. ColorKitchen Pink Dye and in the last bowl add 1 tsp. ColorKitchen Pink Dye. Stir to combine all of them completely.

Line three 6” cake pans with parchment paper and pour batter into each one and spread evenly.

Bake for 17 minutes or until a wooden pick inserted in center comes out clean.

While the cake is baking, in a double boiler add the white chocolate and melt until completely melted.

Once the white chocolate is melted spread it all over the ice cream cone and sprinkle it with the white sprinkles. Once it is completely covered in sprinkles, place it on a cookie sheet or plate and put in the freezer.

Once the cakes have cooled, remove them from the cake pans and make the cake frosting.

In the bowl of your stand mixer add the butter, powdered sugar, vanilla extract and water. Mix on low until all ingredients are combined then speed mixer up to high for 1 minute or until light and fluffy. Scrape bowl if needed and mix again.

On a cake stand or spinner, place a small amount of frosting and put the darkest cake later first. Then spread a generous amount of frosting, sprinkle rainbow sprinkles and then top with the second darkest cake layer. Repeat this process again and top with the lightest pink cake layer. For a full crumb coat tutorial, find one here.

Finish frosting the cake smooth.

After you have frosted the cake smooth, use the same bowl to make the decorating frosting following the same instructions as the cake frosting that you just made.

all natural purple frosting

In a small dish, add ¼ tsp. ColorKitchen Pink Dye and ¼ tsp. ColorKitchen Blue Dye and ¼ tsp. water, mix together to create dark purple dye.

Add a very little bit of frosting and stir to combine completely. Put in a piping bag with decorating tip #4.

Pipe eyes with eye lashes on the front top part of the cake. You won’t need this dark purple frosting after this.

To make the ears, cut rounded triangle shapes out of the graham cracker.

Next add a small amount of frosting into a piping bag with decorating tip #8 or similar. Frost the inner part of the ear and cover in white sprinkles.

Using the piping bag with the decorating tip #8, pipe frosting onto the bottom of the ears and the bottom of the horn and stick them onto the cake. I put the ears a little more forward than the horn.

You can put the remaining frosting from the piping bag with tip #8 back into the mixing bowl with the rest of the white.
Get three mixing bowls and in the first bowl add 1/8 tsp. ColorKitchen Green Dye, ¼ tsp. ColorKitchen Blue Dye and ¼ tsp. water and mix to combine into a turquoise food coloring.

Unicorn Cake frosting

In the second bowl, add 1/8 tsp. ColorKitchen Blue Dye, 1/8 tsp. ColorKitchen Pink Dye and ¼ tsp. water and mix to combine into lavender food coloring.

In the third bowl, add 1/8 tsp. ColorKitchen Pink Dye and ¼ tsp. water to combine into pink food dye.

Divide the remaining frosting into the three bowls, adding more into the turquoise than the pink and lavender.

Stir to combine the frostings into the three colors.

Put the turquoise frosting in a piping bag with decorating tip #846. Put the lavender frosting into a piping bag into a piping bag with decorating tip #96. And put the pink frosting into a piping bag with decorating tip #32.

Starting right between the eyes, pipe rosettes with the purple frosting up into the middle of the cake.
Fill in with piping dollops with the pink, and then towards the back start the main by piping roses with the turquoise.

Fill in with purple, pink and blue however you want – this is the fun part and you can make it look however you want!

Baker’s Note: Make this cake gluten free by substituting the cake flour for an organic gluten free flour blend. Our favorite is Namaste Perfect Flour Blend.

Recipe by Mimi's Cookie Bar

http://www.colorkitchenfoods.com/products/unicorncolors

Succulent Cake with the Ultimate Colorful Black Frosting | Natural | Dye-free

Cake with colorful black frosting

Have you been searching for a way to make a natural black frosting? We've got the ultimate black frosting recipe to make an amazing naturally colorful Black Succulent Cake! 

MAKES 3 Layer 6” Cake

Ingredients

CAKE
1 stick (113 g) organic butter, softened
198 g (¾ cup + 2 tbsp) organic sugar
1 tsp organic vanilla extract
3 (102 g) organic egg whites
½ cup organic milk
170 g (1 cup + 3 tbsp) all natural cake flour
½ tsp sea salt
½ tsp baking powder

BLACK FROSTING
1 ½ sticks (170 g) organic butter, softened
340 g (2 ½ cups) organic powdered sugar, sifted
2 tsp all natural almond flavor
1 tsp organic vanilla extract
1 tbsp food grade raw activated charcoal *
2-3 tsp water

SUCCULENT FROSTING
For Lavender – use tip #126
¾ stick (85 g) organic butter, softened
170 g (1 cup + 3 tbsp) organic powdered sugar
⅛ tsp Blue Color Kitchen Color
⅛ tsp Pink Color Kitchen Color
1-2 tsp water

For Dark Green – use tip #104
¾ stick (85 g) organic butter, softened
170 g (1 cup + 3 tbsp) organic powdered sugar
½ tsp Blue ColorKitchen Color 
1 tsp Green ColorKitchen Color 
⅛ tsp food grade raw activated charcoal *
1-2 tsp water

For Green – use tip #75
¾ stick (85 g) organic butter, softened
170 g (1 cup + 3 tbsp) organic powdered sugar
½ tsp Blue ColorKitchen Color 
1 tsp GreenColorKitchen Color 
1-2 tsp water

For Dark Turquoise - use tip #8
Extra green frosting
a pinch of raw activated charcoal *
¼ tsp Blue ColorKitchen Color

Tools
Cake spinner (optional)
Cake spatula
Ateco decorating tips #126, 104, 75, 199, 32, 8
4 piping bags
3 couplers
decorating nail (find here)
parchment paper

Directions

Cut parchment paper into 3 inch squares and have ready for later. You’ll want as many squares as you’ll have succulents.

Preheat oven to 350 degrees.

Line three 6” cake pans with parchment paper or grease and flour.

In the bowl of your stand mixer fitted with whisk attachment, whisk egg whites at medium/high speed until stiff peaks form.

Transfer to a separate bowl and set aside.

In the bowl of your stand mixer fitted with paddle attachment (no need to wash), cream the butter, sugar and vanilla extract until smooth.

In a separate bowl whisk together the cake flour, baking powder and sea salt.

Add in the cake flour mixture to the butter mixture alternately with milk, beginning and ending with cake flour.

Gently fold the egg whites into cake batter until smooth.

Measure batter evenly into each cake pan, about 225 g. each.

Bake for 17 minutes or until a wooden pick inserted in center comes out clean.

Allow cakes to cool or place in the freezer while you make the succulents.

In a clean bowl of your stand mixer fitted with paddle attachment, make the lavender frosting first. Add the butter, powdered sugar, blue dye, pink dye and water and mix on low until combined. Then speed mixer up to high for 1 minute or until light and fluffy. Put the frosting in a piping bag with decorating tip #126.

Using a decorating nail, place a small dollop of frosting on the nail. Then place a square of parchment paper on the nail so it sticks.

With your piping bag turn it so the thick side of the tip is on the bottom and the thinner side is on the top. Pipe a circle, creating a cone. Then pipe another one right on top of it.

BlackSucculentCakeRoseFrosting.jpg

Next, holding your piping bag the same way, pipe an upside down “U” on top of the cone. Then pipe 2 more to create a circle around the cone. You have now created the first layer of your rose. Continue to pipe upside down “U” shapes around the center until you have a larger succulent looking rose. Pull the parchment paper off the nail and place on a baking sheet and place in the freezer.

I piped about 4 of these so I could pick the ones I liked best for the cake. Pipe them until you have ones you like, you can even put the frosting back into the bag if you don’t like how it looks and you’re practicing. Just make sure to save some of the lavender frosting, at least a third of it.

Next, make the dark green frosting. In a clean bowl of your stand mixer fitted with paddle attachment, add the butter, powdered sugar, blue dye, green dye, activated charcoal and water. Mix on low until combined, then speed mixer up to high for 1 minute or until light and fluffy.

In a piping bag with a coupler and decorating tip #104 put half the dark green frosting in on one side and the rest of the lavender frosting on the other side, it doesn’t have to be perfect.

Using the decorating nail again, pipe a dollop of frosting on it and place a square of parchment paper.

With the piping bag facing straight down and the large side in the center, pipe a spiral.

Next, going around the spiral, pipe upside down “U”s again creating petals.

Do a couple layers to create however tall you want the succulent to be.

Pull the parchment paper off the nail and place the baking sheet in the freezer.

Save some of the two toned frosting and change out the tip for decorating tip #32, you’ll use this to fill in the top of the cake later.

Next, make the green frosting. In a clean bowl of your stand mixer fitted with paddle attachment, add the butter, powdered sugar, green dye, blue dye. Mix on low until combined, then speed mixer up to high for 1 minute or until light and fluffy. Put about half of the frosting in a piping bag with a coupler and do not put a decorating tip in just yet.

On a square of parchment paper, pipe a large dollop of frosting. However tall you make this mound will be how tall this plant is.

Now add the decorating tip #75.

Starting at the top, pipe a line down to the bottom. Then directly across from that line do the same thing so half of the dome has a line down to the bottom.

Next, pipe a line down to the bottom from half way between those two lines on each side, so you have four lines going down to the bottom. This will help keep your plant symmetrical.

Next fill in the holes with lines going from the top to the bottom. The bottom doesn’t have to be perfect because you can trim this later. I just used a knife to trim off the edges so it was smooth. Place the parchment paper square on the baking sheet with the rest of the plants in the freezer.

Remove the decorating tip and replace it with decorating tip #199. You will use this later to fill in the top of the cake.

With the other half of the green frosting, add the blue dye and a pinch of activated charcoal. Stir to combine completely so you have a dark turquoise frosting. Put in a piping bag with a coupler but do not put a tip in just yet.

BlackSucculentCakeRoses.jpg

On a square of parchment paper, pipe a large dollop of frosting exactly like you did with the green.

Now put the decorating tip #8 in the coupler.

Just pipe spikes coming out of the middle of the dollop, going all the way around.

Pipe another set on top, placing them in between each of the bottom ones and continue up until the circle is full of spikes. Place this on the baking sheet with the rest of the plants and keep the baking sheet in the freezer until you are ready to assemble the cake.

By this time your cake should be cooled and ready to assemble. So it’s time to start the black frosting. In the bowl of your stand mixer fitted with paddle attachment, add the butter, powdered sugar, activated charcoal, vanilla extract and almond flavor. Mix on low until all ingredients are combined then speed mixer up to high for 1 minute or until light and fluffy. I found the charcoal dried out the buttercream just a little so add a little water if you would like it a little more loose.

On a cake stand, plate or spinner stack, frost and crumb coat your cake. You can find a tutorial here.

Next frost your cake smooth. And now you are ready to start assembling the succulents!

Remove your succulents from the freezer. In order to stick them to the cake, just pull them off the parchment paper and place a dollop of frosting on the bottom and stick to the cake.

BlackSucculentCake_0059.jpg

Once you have stuck all the larger succulents on the cake and filled it how you like, just fill in the empty spaces with dollops of the green and green/lavender frosting.

Baker’s Note: You can make the succulents 24 hours in advance, just store them in the freezer! Also, to make this cake gluten free just substitute the all natural cake flour for an organic gluten free flour blend, our favorite is Namaste Organic Perfect Flour Blend.


High Altitude – bake at 350 degrees for 17 minutes

-recipe by Dessert’D Organic Bake Shop


* COLORKITCHEN, INC. ASSUMES NO LEGAL RESPONSIBILITY FOR USE OR RELIANCE UPON INGREDIENT RECOMMENDATIONS.


Mermaid Cake | Natural | Dye-free

Mermaid Cake

A cake for your mermaid birthday party that will never be forgotten!

MAKES: 6 Layer 6” Cake

Ingredients

CAKE
2 sticks (226 g.) organic butter, softened
340 g organic sugar
2 tsp organic vanilla extract
4 organic large eggs
1 cup organic milk
340 g all natural cake flour
1 tsp sea salt
1 tsp baking powder

mermaid cake

BASE
3 sticks (340 g) organic butter, softened
680 g organic powdered sugar, sifted
1 tbsp + 1 tsp organic vanilla extract
2 tsp water
½ ColorKitchen Blue Color packet

WAVE
1 stick (113 g) organic butter, softened
226 g organic powdered sugar, sifted
½ ColorKitchen Blue Color packet
2 tsp water

MERMAID
1 stick (113 g) organic butter, softened
226 g organic powdered sugar, sifted
1 tbsp water
1 Color Kitchen Blue Color packet
1 Color Kitchen Pink Food Color packet
1 Color Kitchen Green Color packet

SAND
4 organic graham crackers

Tools:
6 – 6” cake pans
parchment paper
piping bags
decorating tips #864, 199, 21, 32, 15, 56, 4
cake spinner
cake round (optional)
cake spatula
bench scraper

Directions

Preheat oven to 350 degrees.

In the bowl of your stand mixer fitted with paddle attachment, cream the butter, sugar and vanilla extract.

Add the eggs and mix on low until combined, scraping sides of bowl if necessary.

mermaid birthday party

In a separate bowl, add the cake flour, baking powder and sea salt and whisk together.

Add the milk and cake flour mixture to the mixing bowl, and mix on low until you have a smooth cake batter.

Separate the cake batter into 3 different bowls, each should weigh about 450 g. each.

In the first bowl, add 2 tsp. Color Kitchen Foods Blue Dye. In the second bowl, add 1 tsp. Color Kitchen Foods Blue Dye. And, leave the last bowl without color. This will create an ombre cake once it is baked.

Next, line the six 6” cake pans with parchment paper.

Pour batter evenly into each cake pan about 227 g each, all colors should be poured into 2 cake pans, so you’ll have 2 cake layers of each color.

Bake for 17 minutes or until a wooden pick inserted in center comes out clean.

Once the cakes have cooled, start the frosting for the base layer. This the light blue frosting that the entire cake is frosted with. In your stand mixer fitted with paddle attachment, add the butter, powdered sugar, blue dye and water. Mix on low until all ingredients are combined, then speed mixer up to high for 1 minute or until light and fluffy.

Place the darkest cake lay on a cake spinner or stand. Place a generous amount of frosting and spread evenly. Top with the second cake layer that is the same color.

Repeat this process with the next shade of blue and then the white.

Crumb coat the cake, and then frost it so it is smooth. You don’t have to worry about getting the bottom part of the cake super smooth because you are going to cover it up with the waves anyways.

Now it’s time to make the waves frosting. In the bowl of you stand mixer fitted with paddle attachment, add the butter, powdered sugar, blue dye and water. Mix on low until all ingredients are combined, then speed mixer up to high for 1 minute or until light and fluffy.

Put in a piping bag with decorating tip #864. Pipe a wave motion, it should feel like you’re drawing a sideways “S”.  

Next, it’s time to make the Mermaid frosting. In the bowl of your stand mixer fitted with paddle attachment, add the butter, powdered sugar and water. Mix on low until all ingredients are combined, then speed mixer up to high for 1 minute or until light and fluffy.

Once the Mermaid frosting is made, separate it into 3 bowls. They should weigh 113 g. each. In the first bowl, add ½ tsp. green dye and stir to combine completely. In the second bowl, add ½ tsp. blue dye and ½ tsp. pink dye and stir to combine completely. In the last bowl, add ½ tsp. blue dye and ½ tsp green dye, and stir to combine completely. You will end up with green, purple and teal.

Put the Mermaid frosting in piping bags with decorating tips. I used #56 for the teal, #4 for the purple and #15 for the green. Then I switched them out a couple times for #262 and #24. You can use any tips you like, I just found that the smaller ones that resembled star tips worked the best for filling in the scales.

Draw Mermaid fins around the cake. I got 4 Mermaid fins total, but you can do more or less. I piped scales on all the fins and then just filled in randomly with colors. This is your opportunity to have fun and do freestyle!

Once the Mermaid fins are complete, switch out the tips for #199, #21 and #32 and pipe dollops on the top all the way around the cake for the boarder.

If you want to add sand to the top, add the graham crackers to a food processor and grind until you have a sand like texture. Sprinkle the sand all on the top of the cake.

Eat cake!

Baker’s Note: To make this cake gluten free, just substitute the all natural cake flour for an organic gluten free flour mix. Also, make sure to either omit the sand or use gluten free graham crackers.


Glaze for Bundt Cake & Doughnuts | Natural

Cake Donut

Who can eat a bundt cake without rainbow sprinkles and dye free glaze???

MAKES: GLAZE FOR SMALL BUNDT OR ½ DOZEN DOUGHNUTS

INGREDIENTS

1 cup powdered sugar
3 tbsp butter or coconut oil
¾ tsp vanilla
1½ tbsp water
1 Color Kitchen Color packets
1 Color Kitchen Rainbow Sprinkles (optional)

     
DIRECTIONS

In small bowl blend 1 packet of color with ½ tsp water.  Mix until a paste and color is dissolved. Set aside.

Melt butter or oil in a saucepan over low heat. 

Stir in sugar and vanilla. Add 1 tbsp water. Whisk until smooth and consistency of a thick syrup.

Allow to cool for a minute. 

Slowly stir in color mixture and blend.

Drizzle over cooled cake or dip donuts. Top with rainbow sprinkles.

Shortbread Cookies with Royal Icing and Candied Flowers and Herbs | Artificial Dye-free

candied flower shortbread cookie

These cookies are absolutely gorgeous and invite you to get creative in decorating with nature!

MAKES: 16-18 COOKIES

INGREDIENTS

COOKIES
⅓ cup rice flour
1½ tsp kosher salt
2½ cups all-purpose flour, plus extra for rolling dough
1 cup (2 sticks) plus 6 Tbsp. unsalted butter, cut into pieces, room temperature
¾ cup granulated sugar
candied flowers and/or herbs for decorating

ROYAL ICING
3 large egg whites
4 cups powdered sugar
½ tsp cream of tartar
2-3 Color Kitchen Color packets
a couple drops of water or glycerin for mixing colors

DIRECTIONS

ICING
Using a wooden spoon or rubber spatula, stir egg whites, powdered sugar, and cream of tartar in a medium bowl until a thick paste forms with no dry spots. Ideally, icing should sit at least 12 hours for sugar to fully hydrate (it can be covered and chilled up to 1 week), but it can be used as soon as cookies have cooled.

Bring to room temperature before using. In separate bowls mix colors with a couple drops of water or glycerin to form a smooth paste. For pastels use about ½ a packet per bowl. Starting slowly add icing to colors. Stir and continue adding until you have reached the desired intensity of color.

Cover your bowls of colored icing well with plastic to avoid them drying out until you are ready to start decorating. 

SHORTBREAD
Whisk rice flour, salt, and 2½ cups all-purpose flour in a medium bowl. Using a stand mixer with the paddle on medium-high, beat butter and sugar until very pale and fluffy, about 5 minutes. Mix in dry ingredients on low until fully combined. Form into a flat disk and wrap in plastic and chill at least 2 hours, and up to 2 days.

Preheat oven to 350°. Roll out dough between 2 sheets of lightly floured parchment to ⅛” thick. Using large cutter, cut out 16 rounds, re-rolling scraps. Using small cutter, punch out centers. Bake on parchment-lined baking sheets until edges are golden, 12–14 minutes. Let cool on a wire rack.

DECORATING
Ice your cookies using the instructions in the link below. This method is called “flooding”. While the icing is still wet add your candied flowers in any design you like. Let them dry completely before storing them in a single layer in an air-tight container.

Candied Flowers

Excellent video showing how to ice cookies.        
How to make candied flowers.

- Recipe by chef Rose Archer

Quick and Easy Naturally Colorful Pasta | Plant-based | Dye-free

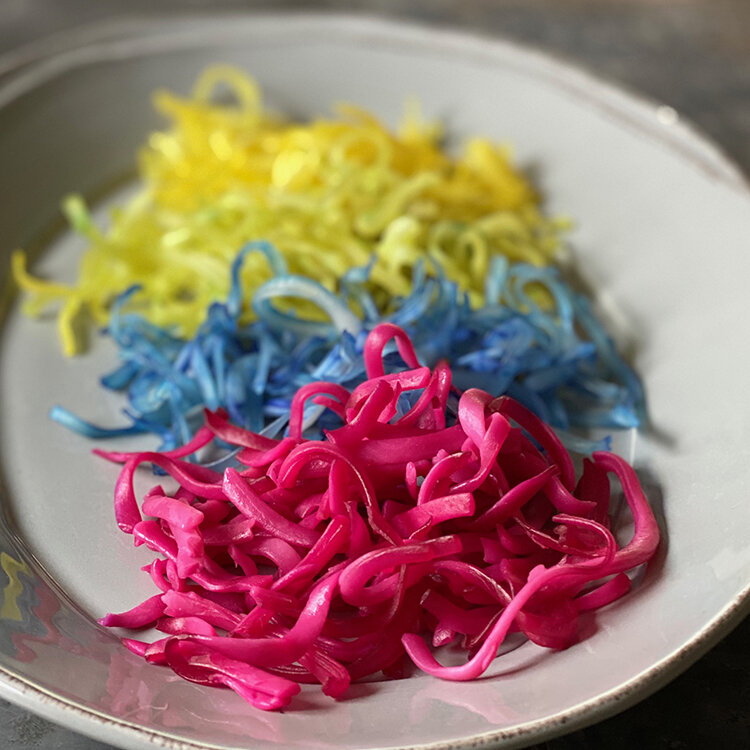
colored pasta

Make naturally colorful pasta and transform your favorite dish into a colorful delight. Whether it be unicorn pasta, macaroni and cheese or pasta salad, you’ll have fun making and eating it too!

INGREDIENTS

1 bag of your favorite pasta (regular or gluten-free)
1-2 Color Kitchen Color packets

DIRECTIONS

Cook and rinse pasta.

Use 1 color packet per 2-3 cups cooked pasta (8 cups per bag) for deep colors, or 1 color packet per entire bag of pasta or a light pastel shade.

Put color powder in ziplock bag and add strained pasta. Mixed thoroughly, tossing pasta in bag until all the color is dissolved and pasta is completely covered.

Let sit for 10 minutes for color to soak in. Rinse each color separately to remove excess liquid..

Add sauce or topping of your choice and enjoy!

Easter Egg Sprinkle Cookies

Easter Egg Sprinkle Cookies

A fun way to celebrate Easter with the kids while not having to dye eggs!

MAKES: 3 Dozen Cookies

Ingredients-Cookie

2 sticks (227 g.) organic butter, softened
142 g. organic powdered sugar, sifted
2 tsp. organic almond extract
255 g. organic flour
3 packets Color Kitchen Foods Rainbow Sprinkles

Ingredients-Topping

340 g. (12 oz.) organic white chocolate, chopped
Color Kitchen Foods Pink, Yellow, Blue Food Dyes 

Directions

Preheat oven to 350 degrees.

In a shallow bowl, add the sprinkles. Set aside.

In the bowl of your stand mixer fitted with paddle attachment, add the butter, powdered sugar and almond extract. Mix on low until all ingredients are combined.

Add the flour and mix until combined.

Easter Egg Sprinkle Cookies

On a baking sheet fitted with parchment paper, hand form egg shaped cookies. This is really simple, just make a ball and then squeeze each side a little to create a point. Each dough ball should be about 1.5” in diameter.

Dip each egg shaped dough ball into the sprinkles, and space them at least 1” apart on the baking sheet.

Bake for 13 minutes.

Allow cookies to cool before beginning next step.

In a double boiler, add the white chocolate and melt until three-quarters melted. Remove from heat and stir vigorously until completely melted.

Separate the white chocolate into four bowls.

Sprinkle a little bit of pink dye into one bowl, yellow in another, blue and yellow to create green in another and pink and blue to create purple. Use equal parts of each when combining the colors. To get pastel colors, it is too little of an amount to measure so be careful not to sprinkle too much or you’ll end up with a brighter color.

Stir each bowl of chocolate to combine the dyes completely.

Dip the bottom (the non sprinkle side) of each cookie in different colored chocolate. Set them chocolate side down on a baking sheet with parchment paper.

Allow to set until cool or in the fridge.

Eat cookies!

Store in a cool dry place, or in the fridge.

Baker’s Note: To make these cookies gluten free, substitute the organic flour for 227 g. organic gluten free flour blend and 57 g. organic coconut flour.

Mammoth Lakes – bake at 350 for 11 minutes

- Recipe by Mimi's Cookie Bar

Colorful Whipped Cream Recipe

Colorful Whipped Cream

Add a dollop of natural color to your favorite dessert, from pie to ice cream, or even pancakes! Homemade whipped cream is easy and takes just a few minutes. 

INGREDIENTS

⅓ cup powdered sugar
1 Color Kitchen Color packet
1 ¼ cup heavy cream
1 tsp vanilla

DIRECTIONS

Chill a medium-sized bowl in the freezer for at least 10 minutes.

Blend dry ingredients: powdered sugar and color.

Add heavy cream and vanilla extract.

Beat with an electric mixer on high speed until stiff peaks form.

Best Naturally Colored Rainbow Cake

Naturally Colored Rainbow Cake

Naturally colorful layered rainbow cake made with plant-based colors.

Ingredients

2 cups white sugar
1 cups butter
4 eggs
4 tsp vanilla extract
3 cups all-purpose flour
3 ½ tsp baking powder
1 cup milk
2 Yellow Color Kitchen Color packets
1 Orange Color Kitchen Color packet
2 Pink Color Kitchen Color packets
2 Green Color Kitchen Color packets
2 Blue Color Kitchen Color packets

Directions

Preheat oven to 325 degrees F. Grease and flour five 6 inch cake pans (¾" thick). Each pan holds a generous ½ cups batter. Wilton offers a complete set of 5. Thin layers are needed for a shorter bake time to reduce color fading

Cream together the sugar and butter in a medium sized bowl. Next, beat in the eggs, and then stir in the vanilla. In another bowl, combine flour and baking powder. Add to the creamed mixture and blend thoroughly. Next add milk and stir until smooth.

For yellow, in a small bowl, mix 2 yellow packets with just a couple drops of water. Stir until dissolved. Add color to a generous ½ cups of batter and blend. Pour or spoon batter into the prepared pan.

For orange, in a small bowl, mix 1 orange packet with just a couple drops of water. Stir until dissolved. Add color to a generous ½ cups of batter and blend. Pour or spoon batter into the prepared pan.

For pink, in a small bowl, mix 2 pink packets with just a couple drops of water. Stir until dissolved. Add color to a generous ½ cups of batter and blend. Pour or spoon batter into the prepared pan.

For green, in a small bowl, mix 2 green packets with just a couple drops of water. Stir until dissolved. Add color to a generous ½ cups of batter and blend. Pour or spoon batter into the prepared pan.

For blue, in a small bowl, mix 2 blue packets with just a couple drops of water. Stir until dissolved. Add color to a generous ½ cups of batter and blend. Pour or spoon batter into the prepared pan.

Bake for 20-25 minutes. Use a toothpick to see if batter is baked in the middle. 

When cakes are done, let cool completely before frosting.

Candy Corn Chocolate Cake | Gluten-free

Candy Corn Chocolate Cake

This Halloween enjoy a different kind of Candy Corn in the form of a delicious cake!

MAKES: One 9” Cake

INGREDIENTS

1 bag Pamela’s Gluten-Free Chocolate Cake mIx
1 pint Wholesome Organic Vanilla Frosting
1 Orange Color Kitchen Color packet
1 Yellow Color Kitchen Color packet

DIRECTIONS

Follow the directions on the back of the cake mix and pour into 9” cake pan.

Once the cake is cooled, remove from pan and plate.

Divide frosting into three bowls. Add ¼ cup plain white frosting into first bowl and set aside.

In second bowl, add ColorKitchen Yellow packet and stir in ¼ tsp water to make a paste. Add ½ cup frosting and blend with a hand mixer with 1 beater attached until color fully blended.

In third bowl, add ColorKitchen Orange packet and stir in ¼ tsp water to make a paste. Add 1 cup frosting and blend with a hand mixer with 1 beater attached until color fully blended.

Take frosting knife and frost center circle of cake with white frosting 3” in diameter. Around white circle add larger yellow frosting circle about 3” in diameter. Complete frosting with outer circle of orange, to the edge of the cake. Frost sides of cake with remaining frosting.

Cut cake to make candy corn slices and enjoy!

Circus Shortbread Cookies

Circus Shortbread Cookies

MAKES: 3 Dozen

Ingredients-Cookies


2 sticks (226 g.) organic butter, softened
142 g. (1 cup) organic powdered sugar, sifted
1 T. vanilla extract
2 tsp. all natural almond flavor
255 g. (2 cups) organic flour

Ingredients-Glaze


170 g. (1 cup + 3 T.) organic powdered sugar, sifted
2 T. water
1 T. all natural cherry flavor
½ tsp. organic vanilla extract
¼ tsp. of  Pink Color Kitchen Color packet
India Tree natural white pearls

Directions:


Preheat oven to 350 degrees.
In the bowl of your stand mixer fitted with paddle attachment, add the butter, powdered sugar, vanilla extract and almond flavor. Mix on low until combined, if there are still butter chunks it’s okay.

Add the flour and mix on low to combine completely.

On a baking sheet with parchment paper, ball the cookies into a round disk like shape. They should be about 1.5” in diameter. Space them at least 1” apart, they will spread slightly when baking.

Bake for 13 minutes.

Once the cookies have cooled, start the glaze. 

In a mixing bowl, add the powdered sugar, water, cherry flavor, vanilla extract and pink dye. Whisk or stir to combine completely into a hot pink glaze.

Drizzle glaze over cookies and sprinkle with white pearls. 

High Altitude – bake at 350 degrees for 11 minutes

-recipe by Dessert’D Organic Bake Shop


Greek Yogurt Popsicles

Greek Yogurt Popsicles

Between the artificial coloring and sugars in a variety of frozen treats, it's hard to feel good about feeding  your kids some of the summer treats they crave most.

Try our quick and easy-to-make alternative, Greek yogurt popsicles made with ColorKitchen food coloring, for a protein-packed, real-food choice for the summer months.

INGREDIENTS

1 cup Greek yogurt
1 tbsp honey
2 tbsp chocolate chips
2-3 Color Kitchen Color packets

DIRECTIONS

Using your favorite Greek yogurt, add a tablespoon of honey per cup of yogurt. Next, stir in as much Color Kitchen color powder as desired until thoroughly blended. Lastly, mix in a few chocolate chips. 

Thoroughly mix all ingredients together. Scoop into popsicle molds and allow to set in the freezer. 

For multiple colors, scoop in one color layer at a time, then freeze.

If you don't have a nifty popsicle-making container like the one in this post, use an ice cube tray with toothpicks for mini popsicles. 

Flower Cupcakes

Flower Cupcakes

These creations require a certain level of effort, but are oh-so worth it!

MAKES: 2 Dozen Cupcakes

Ingredients-Cupcakes


2 sticks (226 g.) organic butter, softened
340 g. organic sugar
1 T. + 1 tsp. organic lemon flavor
4 organic large eggs
1 cup organic heavy whipping cream
340 g. all natural cake flour
1 tsp. baking powder
1 tsp. sea salt

Ingredients-Frosting


3 sticks (340 g.) organic butter, softened
680 g. (24 oz.) organic powdered sugar, sifted
1 T. organic coconut extract
Color Kitchen-Pink, Blue and Yellow Dyes

Ingredients-Chocolate Frosting


2 T. organic butter, softened
15 g. organic Dutch cocoa, sifted
42 g. organic powdered sugar, sifted
1 tsp. water

Tools


Piping Bags
Decorating tips #127, 864, 846, 56

Directions


Preheat oven to 350 degrees.

In the bowl of your stand mixer fitted with paddle attachment, add the butter, sugar and lemon flavor. Mix on low until all ingredients are combined.

Add the eggs and mix until combined.

In a separate bowl, add the cake flour, baking powder and sea salt and whisk together.

Add the cake flour and and cream in together and mix on low until you have a smooth cake batter.

Line two cupcake pans with liners, and fill cupcakes three-quarters full.

Bake for 17 minutes or until a wooden pick inserted in center comes out clean.

Allow cupcakes to cool before frosting.

In the bowl of your stand mixer fitted with paddle attachment, add the butter, powdered sugar and coconut extract. Mix on low until all ingredients are combined, then speed mixer up to high for 1 minute or until light and fluffy.

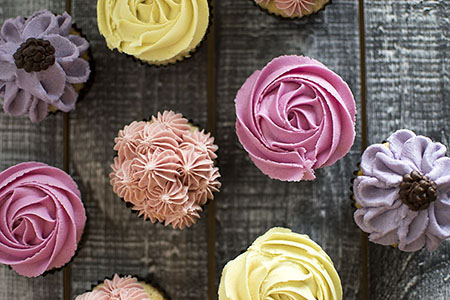
flower cupcakes

Separate the frosting into four separate bowls, each bowl should weigh about 255 g.

In one bowl, color it pastel yellow by adding ½ tsp. ColorKitchen Yellow Dye. Stir to combine completely. Put in a piping bag with decorating tip #846.

In the second bowl, make pastel purple by adding ⅛ tsp. ColorKitchen Pink Dye and  ⅛ tsp. ColorKitchen Blue Dye. Stir to combine completely. Put in a piping bag with decorating tip #127.

In the third bowl, make pastel pink by adding ¼ tsp. ColorKitchen Pink Dye. Stir to combine completely. Put in a piping bag with decorating tip #846.

In the last bowl, add ⅛ tsp. ColorKitchen Pink Dye and ¼ tsp. ColorKitchen Yellow Dye to create a pastel orange. Stir to combine completely. Put in a piping bag with decorating tip #864.

In your stand mixer fitted with paddle attachment, add the butter, powdered sugar, cocoa and water. Mix on low until all ingredients are combined, then speed mixer up to high for 1 minute or until light and fluffy. Put the chocolate frosting in a piping bag with decorating tip #56. Set aside.

We've included a video below on how to pipe beautiful flowers onto your cupcakes using our plant-based food coloring. 

To frost the pink and yellow cupcakes (like Roses), start in the middle and work your way to the outer edge in a circular motion.

To frost the pastel orange cupcakes, make dollops around the boarder, then in between each dollop, make another dollop on top, finally make the last dollop in the center.

To frost the lavender cupcakes, start with the piping bag in the center of the cupcake, with the smaller end of the tip towards the inside and the larger part of the tip towards the outside. In a swooping motion, make a petal. Right next to it, make another, and another until you’ve gone around the entire cupcake. In between the first two petals, make another petal and complete a second row on top.

Using the chocolate frosting, pipe small dollops in the center of the flower in a circle to cover up the beginning parts of the petals.

Eat flower cupcakes!

Store in a cake dome.

Baker’s Note: To make brighter colors you can double the amount of food coloring. You can also make different colors! To make these cupcakes gluten free, just substitute the cake flour for an organic gluten free flour blend.


 Recipe by Mimi's Cookie Bar

Learn how to pipe beautiful flowers using our natural food coloring. 

Near-Naked Pumpkin Drip Cake

Near-Naked Pumpkin Drip Cake

Put Starbucks to shame with this pumpkin cake that is dye free and delicious!

INGREDIENTS

PUMPKIN CAKE
3 large eggs
16 oz can pumpkin
¾ cup vegetable oil
1 tsp vanilla extract
1 cup granulated sugar
1 cup dark brown sugar
2 ½ cups all-purpose flour
1 tsp baking powder
1 tsp baking soda
1 tsp salt
1 tbsp pumpkin pie spice

CREAM CHEESE FROSTING
8oz package cream cheese
1 cup unsalted butter
4 cups powdered sugar
1 tsp vanilla extract

 ORANGE GANACHE DRIP
1 cup white candy melts
¼ cup heavy cream
½ tsp Orange Color Kitchen Color
1 pinch Red Velvet Color Kitchen Color

DIRECTIONS

CAKE
1Preheat oven to 350. Line bottoms of two round baking pans with parchment paper rounds and coat sides with cooking spray. Batter fits in two 6” by 3” pans or two 8” by 2” pans.

Combine wet ingredients in a mixing bowl and whisk to combine. Add dry ingredients and whisk until flour is incorporated. Pour half the batter in each pan and bake at 350 for 30 minutes, or until toothpick inserted in center comes out clean. Let cakes cool fully before frosting.

FROSTING
Beat cream cheese and butter until smooth. Add powdered sugar and vanilla and continue to mix until smooth and slightly fluffy.

GANACHE
Melt the white chips with the cream in the microwave and mix until smooth. Add the color powder straight to the ganache and stir with a whisk until evenly blended, then pour mixture into a piping bag or plastic baggie.

ganache color

ASSEMBLY

Before assembling the cake, level each layer by slicing off the rounded top.

Once cakes are level they can be stacked and frosted. To achieve the semi-naked look, use a bench scraper or flat spatula to scrape the exterior frosting to the desired thickness. A turntable is helpful to turn the cake as you scrape. When the sides are smooth, use a clean bench scraper or spatula to drag the messy edges into the center of the cake and achieve a sharper edge.

Pipe the warm ganache around the top rim of the cake and let it drip down the sides, then fill in the top.

Finally, use a large star tip and leftover cream cheese frosting to pipe rosettes around the top edge.


~Recipe-Anna Dunn

nude cake

Pumpkin Spice Cake: Hand Painted with Fall Leaves

watercolor frosting pumpkin cake

MAKES: one 9” cake

INGREDIENTS

CAKE
½ cup unsalted butter, room temperature
1 ¼ cups firmly packed light brown sugar
2 large eggs, room temperature
1 cup pure canned pumpkin puree
1 tsp pure vanilla extract
2 cups sifted cake flour
¼ tsp baking powder
1 tsp baking soda
¼ tsp salt
½ tsp ground cinnamon
¼ tsp ground ginger
⅛ tsp ground cloves
½ cup buttermilk, room temperature

DIRECTIONS

Preheat the oven to 350 degrees F. Butter, or lightly spray with a non-stick vegetable spray, two - 8 inch (20 cm) cake pans. Then line the bottom of each pan with a round of parchment paper.

In the bowl of your electric mixer (or with a hand mixer), beat the butter and sugar until light and fluffy (about 3 minutes). Add the eggs, one at a time, mixing well after each addition. Scrape down the sides of the bowl as needed. Add the pumpkin puree and vanilla extract and beat until incorporated (the batter will look curdled).

In a separate bowl, whisk together the flour, baking soda, baking powder, salt and spices. Add the flour mixture and buttermilk alternately to the batter, in three additions, beginning and ending with the flour mixture. Evenly divide the batter between your two pans. Bake for approximately 25 minutes, or until a toothpick inserted in the center of the cake just comes out clean. Cool on a wire rack for 10 minutes and then invert and remove the cakes from their pans. Cool completely before frosting.

INGREDEINTS

CREAM CHEESE FROSTING
8 ounces full fat cream cheese, room temperature
¼ cup butter, room temperature
1 ½ tbsp pure maple syrup
3 cups confectioners' (powdered or icing) sugar, sifted

Place the cream cheese and butter in the bowl of your electric mixer, fitted with the paddle attachment (or use a hand mixer) and beat until smooth. Add the maple syrup and confectioners' sugar and beat until light and creamy and of spreading consistency. Add more sugar or maple syrup if needed.

ROYAL ICING
1 egg white
1 lb powdered sugar
½ teaspoon lemon juice
Color Kitchen Color Packets

Using a stand mixer, combine the egg white and lemon juice. Add some of the sifted powdered sugar and start the mixer on low. Keep adding sugar until the icing is a white, smooth, runny consistency. If it gets too thick add a tiny bit of water. If it gets too runny add a little sugar. We left our royal icing white to create a blank canvas on the cake but if you would like to have a colored background go ahead and color the royal icing by mixing a little Color Kitchen Color Packets with a little glycerin or water to make a smooth paste. Then add a little colored paste to the royal icing. Once icing is done keep it covered tightly with plastic so it won't dry out.

watercolor frosting technique

ASSEMBLY

Place one of the cake layers on your serving plate. Frost with a layer of icing. Place the second cake on top of the first layer and frost the top and sides of the cake. Make the top as absolutely flat as you can. Using a piping bag, pipe a border around the top edge of the cake. Refrigerate cake till completely cold. Once the cake is cold pour a thin layer of the royal icing over the entire top of the cake. Let it sit at room temp until the royal icing is dry to the touch. This could take a few hours. Once the royal icing is dry, it is ready to be painted. Mix an assortment of Color Kitchen Color Packets in little bowls with a tiny bit of water. Mix until smooth and runny. We used yellow, red, green and a mix of all three to make a darker brownish green color. Using clean paintbrushes begin painting your cake in any way you like!

The cake can be chilled for a day, but overnight and the royal icing will begin to soften in the condensation. It won't ruin your cake but it will change the look slightly. Take your cake out of the fridge to warm up a bit before serving. 

- Recipe by chef Rose Archer

Flower Crown Pumpkin Cookies

Hipster Pumpkin Cookies

Your spooky season just got a whole lot sweeter with these pumpkin cookies! They’re to dye for!

MAKES: 2 dozen cookies

INGREDIENTS

COOKIES
1 stick (113 g.) organic butter, softened
170 g organic sugar (¾ cup)
1 tsp organic vanilla extract
2 organic large eggs
198 g organic flour (1 ¼ cup + 2 T.)
43 g organic Dutch cocoa, sifted (½ cup + 2 T.)
1 ½ tsp baking powder
½ tsp sea salt

ORANGE FROSTING
1.5 sticks (170g) organic butter, softened
340 g organic powdered sugar, sifted (2 ½ cups)
1 tsp organic vanilla extract
4 tsp (2 packets) Orange Color Kitchen Color
2-3 tsp. water

DECORATING FROSTING
½ stick (57 g) organic butter, softened
170 g organic powdered sugar, sifted (1 cup + 3 T.)
Green, Blue & Pink Color Kitchen Color packets

TOOLS
Rolling pin
3” round cookie cutter
3 piping bags
Ateco decorating tips #56, 15, 26, 68, 263
1 coupler

Flower Pumpkin Cookies

DIRECTIONS

Preheat oven to 350 degrees.

In the bowl of your stand mixer fitted with paddle attachment, add the butter, sugar and vanilla extract. Mix on low until all ingredients are combined.

Add the eggs and mix just slightly.

In a separate bowl, add the flour, cocoa, baking powder and sea salt and whisk together.
Add the flour mixture into the mixing bowl and mix on low until cookie dough forms.

On a floured surface, roll out cookie dough to about ¼” thick.

Using a 3” round cookie cutter, cut out cookies and place on a cookie sheet with parchment paper. Place at least 1” apart.

Bake for 10-11 minutes.

Once the cookies have cooled start the Orange Frosting. In the bowl of your stand mixer fitted with paddle attachment, add the orange dye and 1-2 tsp. water. Just using a spoon or small spatula mix together to make the orange dye. Then add the butter, powdered sugar and vanilla extract and mix on low until combined. Then speed mixer up to high for 1 minute or until light and fluffy. Add a little more water if needed.

Put the orange frosting in a piping bag with a coupler and decorating tip #56 first. Pipe the outline of the pumpkin onto the cookies.

Then switch out the tip to #15 and fill in the pumpkins.

Next make the decorating frosting. In the bowl of your stand mixer fitted with paddle attachment add the butter, powdered sugar and 1 tsp. water. Mix on low until all ingredients are combined then speed mixer up to high for 1 minute or until light and fluffy.

In a separate bowl add ½ tsp. ColorKitchen Pink Dye and ½ tsp. ColorKitchen Blue dye with 1 tsp. water to make the dark purple.

In another bowl, add ½ tsp. ColorKitchen Green Dye and ½ tsp. water to make the green dye.

You will separate the frosting into those two bowls, adding more into the purple, less into the green and leaving a very small amount in the mixing bowl. Stir the purple and green frosting to combine completely. When the green frosting is completely combined, add a small dollop into the mixing bowl with the white frosting. This will make a light green or mint colored frosting.

Put the purple frosting in a piping bag with decorating tip #26. Put the green frosting in a piping bag with decorating tip #68 and the mint in a piping bag with decorating tip #263.

Pipe one or two roses on top of the pumpkins with purple frosting.

Then pipe leaves around with the green and mint.

Store in the fridge or in an airtight container. 

~Recipe by Mimi's Cookie Bar

Witches Brew Cocktail

Witches Brew Cocktail

Make it a double, toil and trouble….

INGREDIENTS

1-2 drops Color Kitchen Color packet  "gel" (powdered colors with a few drops of water or glycerin) 
Flavored syrup
Soda water
Vodka (optional)

DIRECTIONS

COLOR GEL
In a small bowl add ¼ tsp water or glycerin to 1 tsp color powder.
Blend with brush or spoon until color is dissolved.
Add another ½ tsp water and blend.

In a glass, mix flavored syrup with ¼ cup soda water and ¾ tsp lime juice. Mix with spoon.

Add a couple drops of color “gel” (watch out, it’s extra fizzy with color!)

Add vodka to taste or enjoy as a mocktail with ice cubes.

Refreshing Blue Lemonade | Artificial Dye-free

Blue Lemonade

MAKES: 10 GLASSES

INGREDIENTS

½ gallon natural or organic lemonade
½ Blue Color Kitchen Color packet 
1 lemon
1 tray ice cubes

DIRECTIONS

COLOR GEL
In a small bowl add ¼ tsp water or glycerin to 1 tsp color powder.
Blend with brush or spoon until color is dissolved.
Add another ½ tsp water and blend.

LEMONADE
Fill ½ gallon pitcher with lemonade.

Add color gel and stirs until all the color is mixed.

Add thinly sliced lemon.

Pour into jugs with ice cubes.

Enjoy!